How to Check Your Binance Trade History (and Export It to a Spreadsheet)
How to look up your Binance spot and futures trade history and export periods longer than three months as a spreadsheet, with the exact menu paths and generation limits explained step by step.

Maybe you need records for tax filing, maybe you just want to see how much you've paid in fees. Whatever brings you to your Binance trade history, the basic on-screen lookup only goes back three months.
This guide covers how to look up spot and futures trade history, and how to export periods longer than three months as a spreadsheet.
💡 Quick note before you start!
- No Binance account yet? 👉 [How to sign up for Binance + complete KYC]
- New user bonus + fee discount campaign 👉 [Binance signup event]
Looking up your trade history
1. Getting to your orders
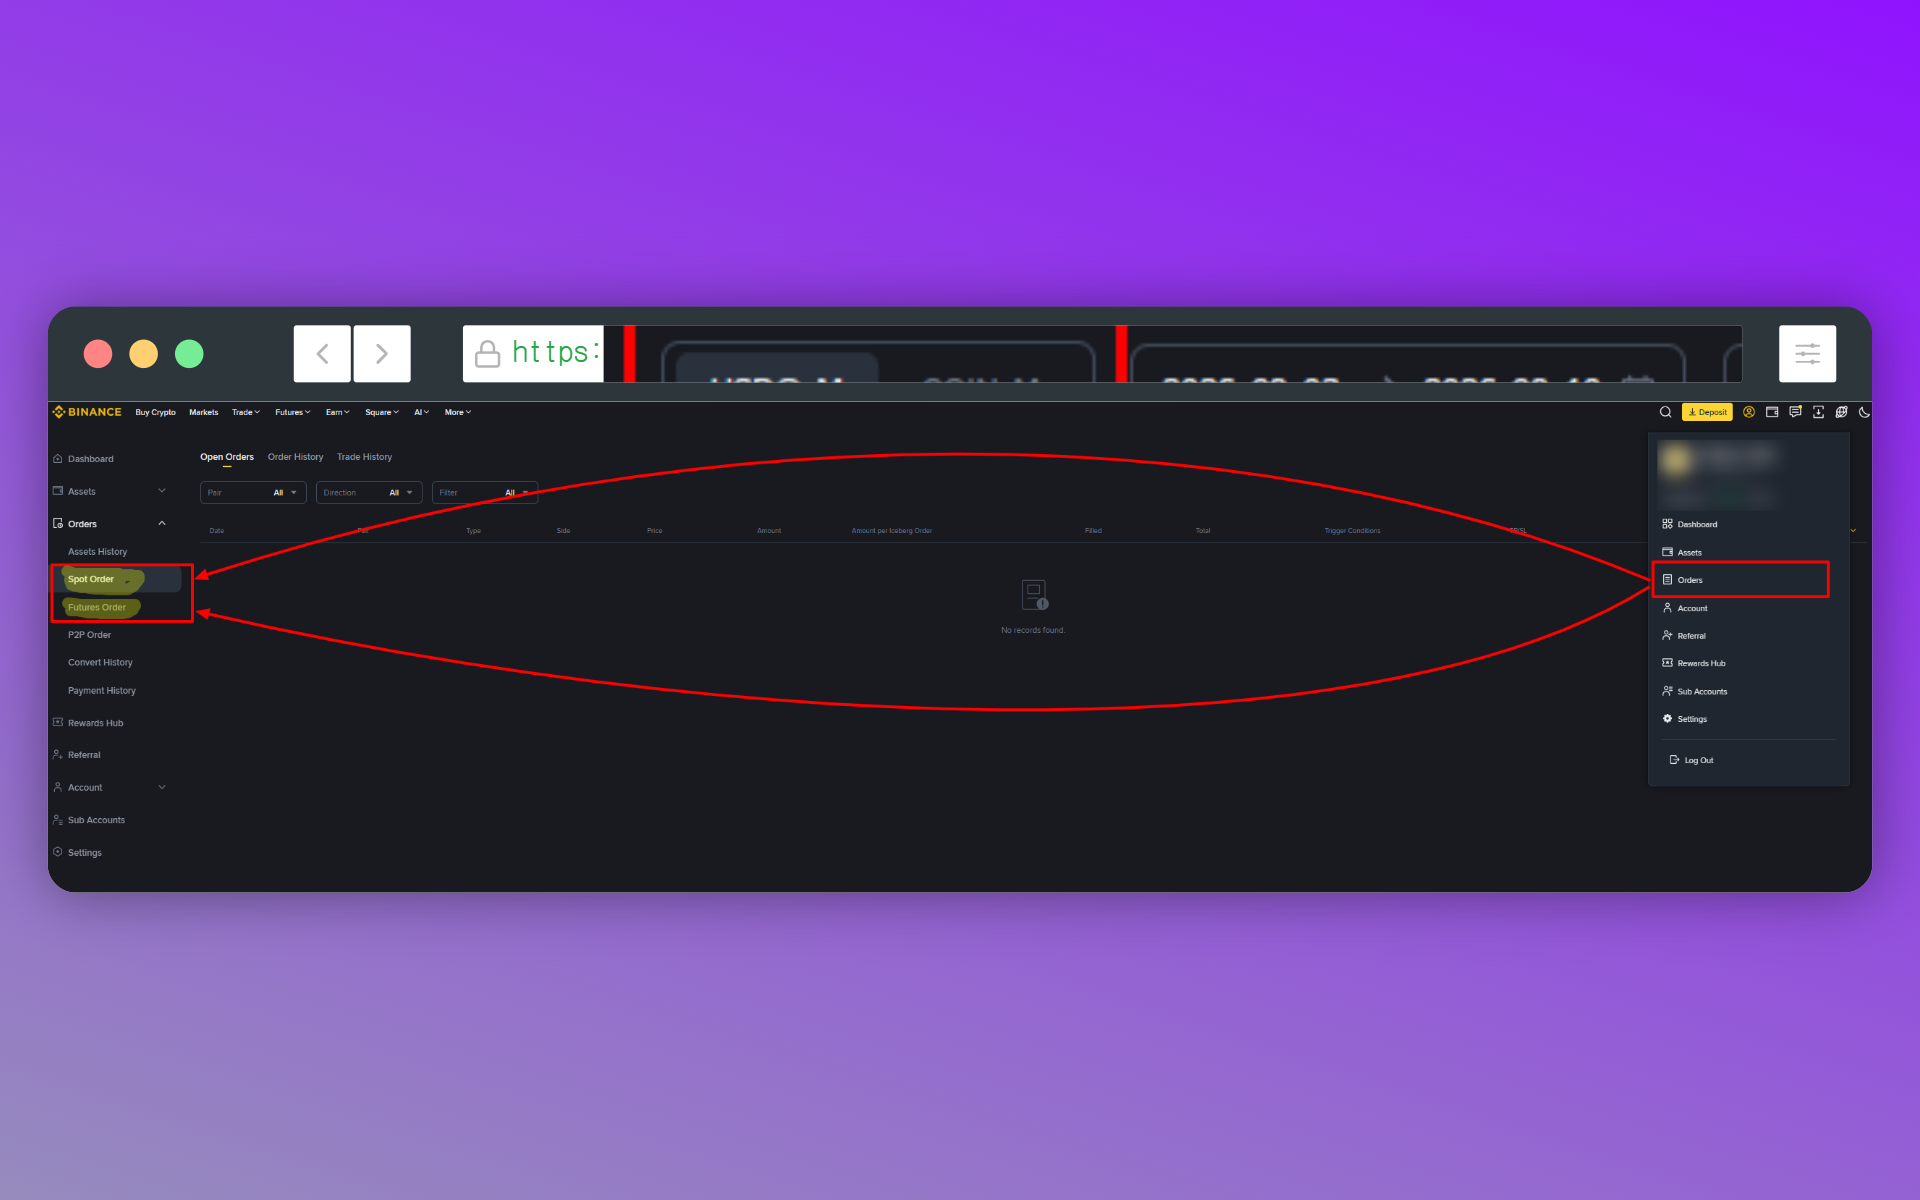
Click the profile icon at the top right and go into [Orders]. For spot records pick [Spot Order], for futures pick [Futures Order].
2. Choosing the filled-trades tab
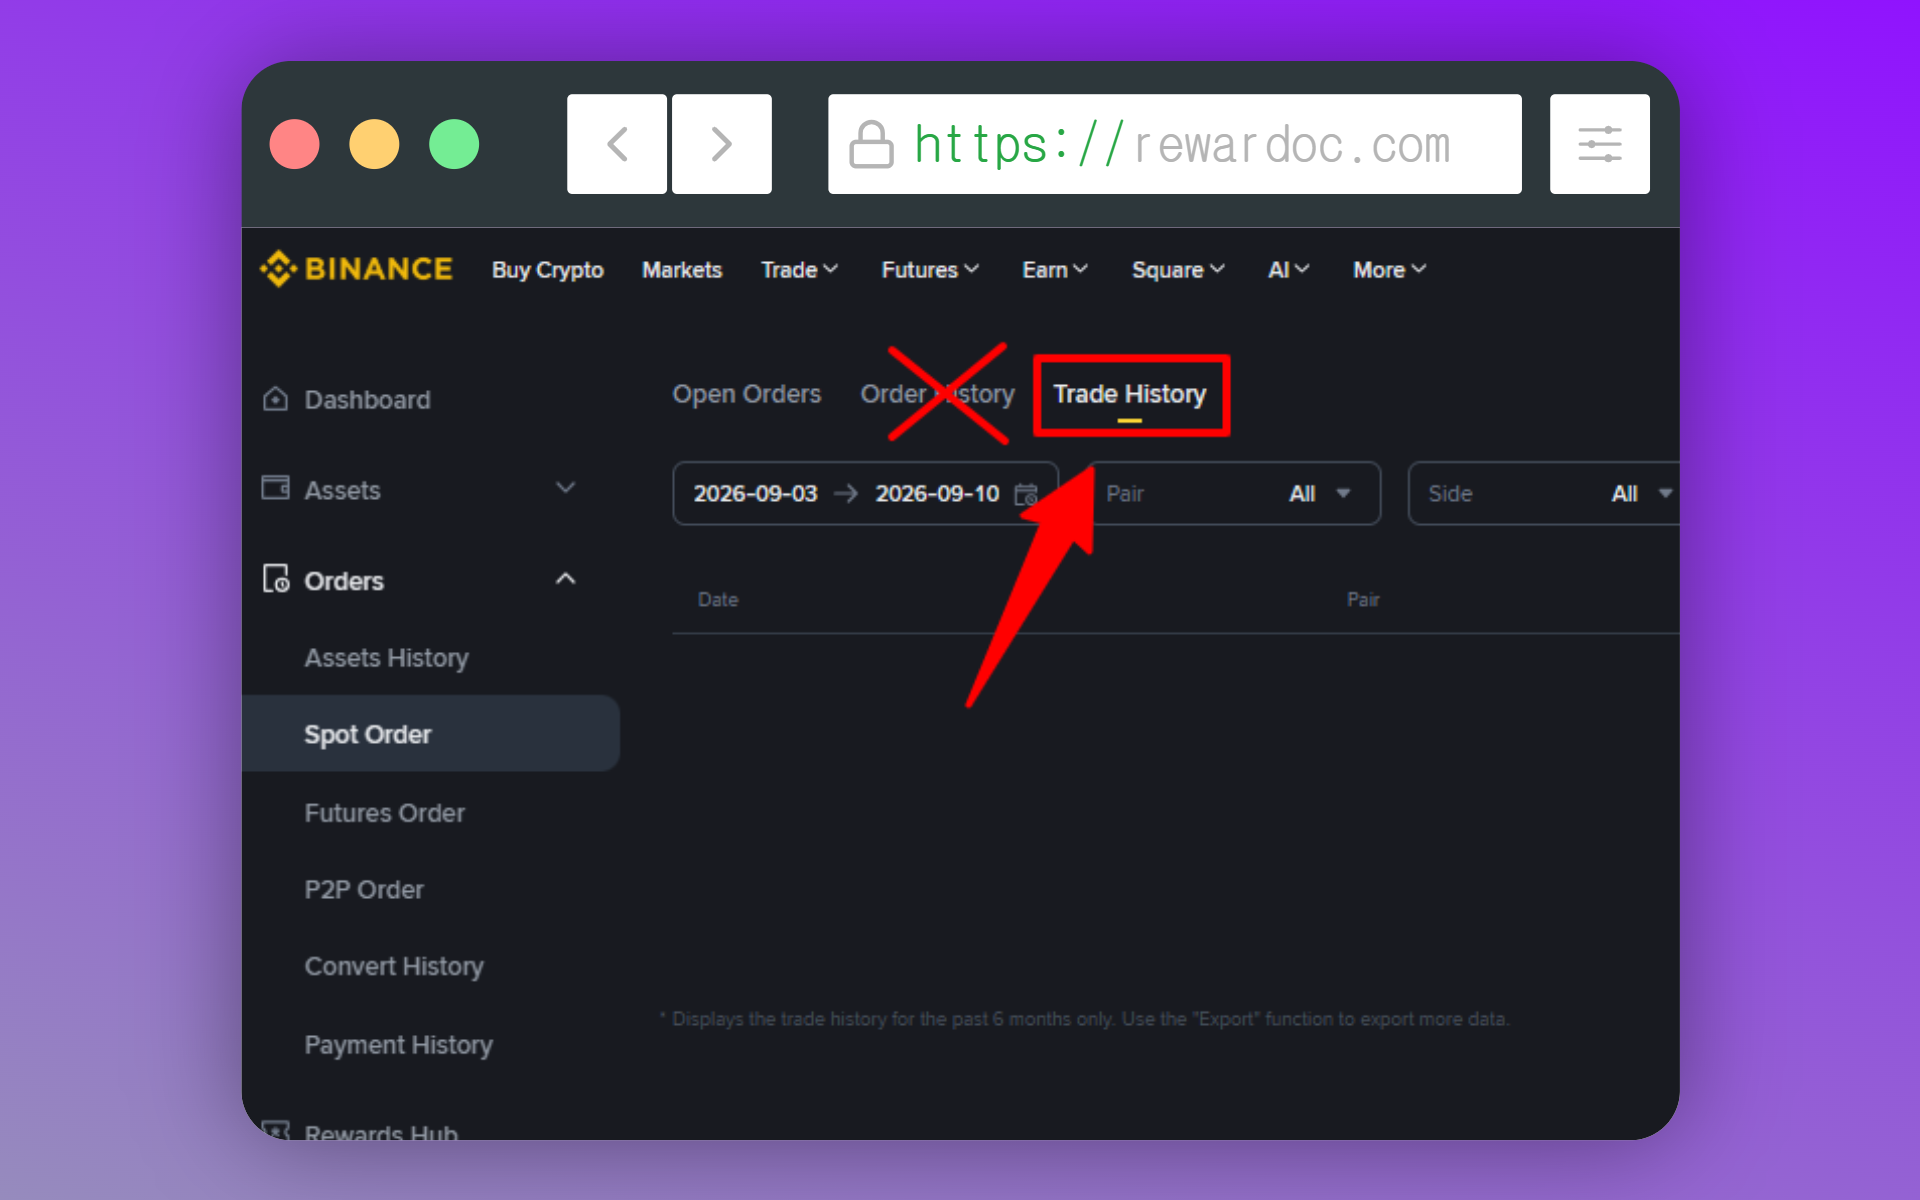
Click the [Trade History] tab. It's easy to mix this up with [Order History] sitting next to it, but if you want only the trades that actually filled rather than every order you placed, [Trade History] is the one.
3. Setting a date range and searching
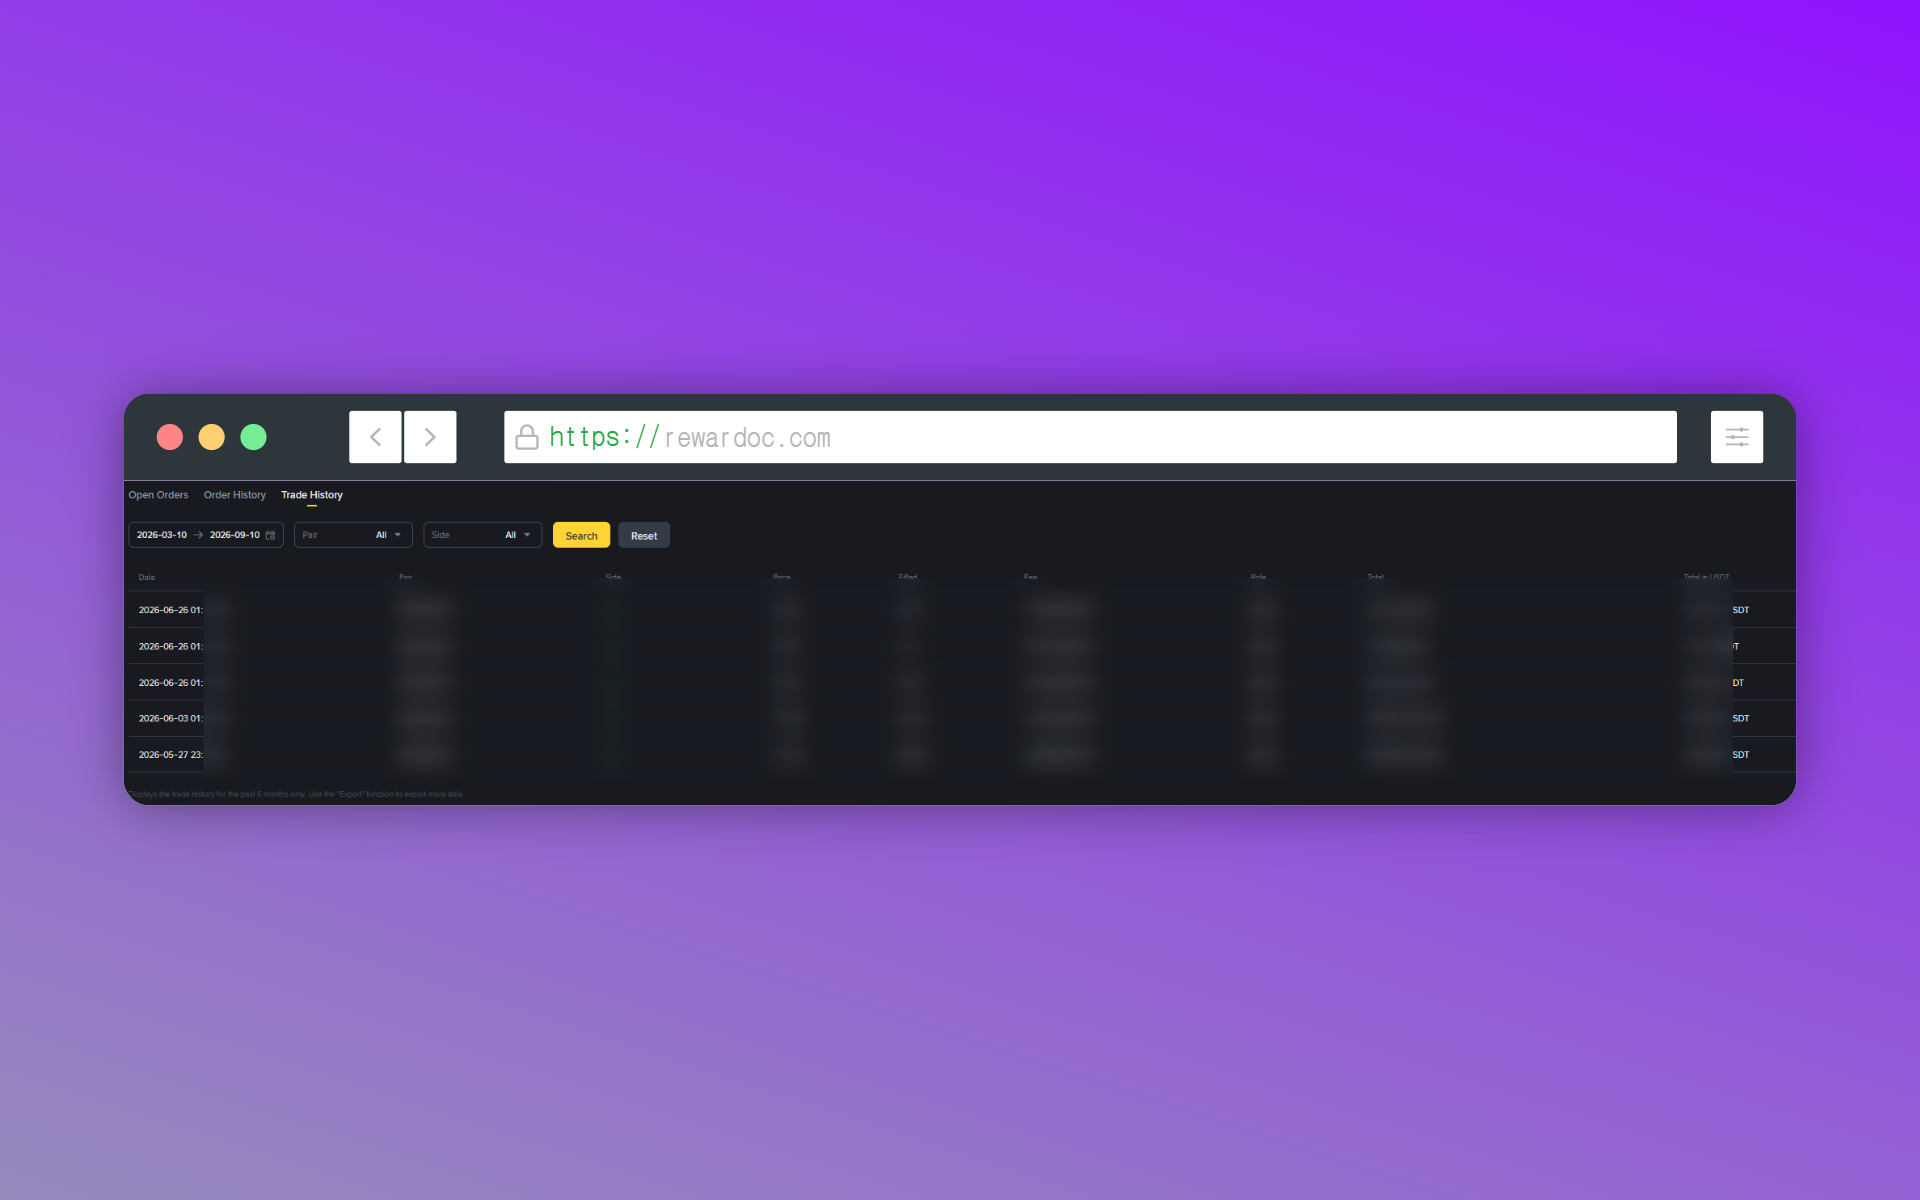
Set your date range and hit [Search]. Your trades for that period come up. On-screen lookup goes back a maximum of 6 months for spot and 3 months for futures.
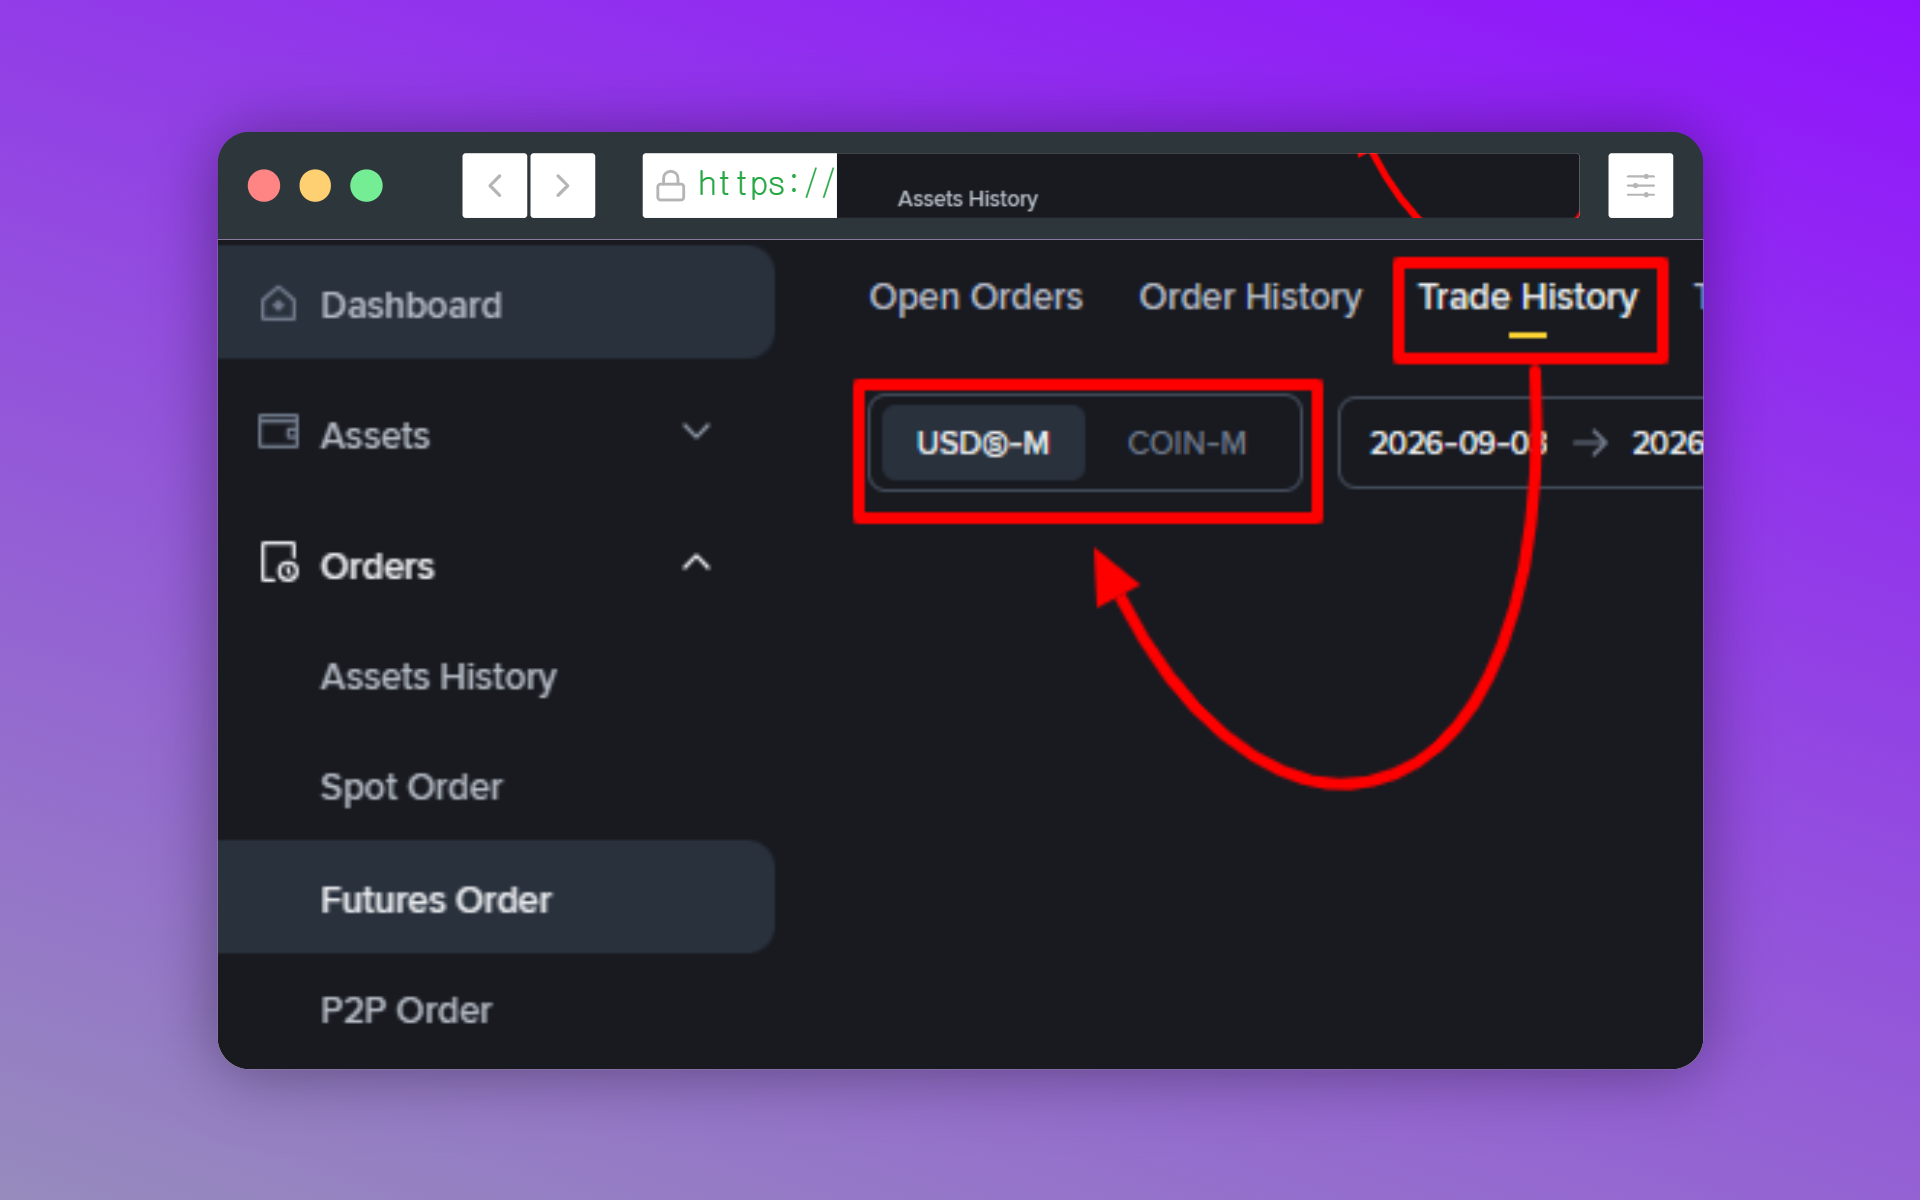
For futures, you have to pick the contract type here as well. For most people that's USDⓈ-M; if you used coins as margin, it's COIN-M. Spot has no equivalent step, so it's easy to skim past on your first try — and if you don't set it correctly, the list comes back empty even though you clearly remember trading.
On the results screen, Symbol is the coin, Time is when it filled, and Side is direction — Buy for long, Sell for short. Price is your average entry, Quantity is size. Fee is what that trade cost you, and Realized Profit is your realized P&L. Note that all trade times are recorded in UTC+0. That may differ from your local time zone, so keep the offset in mind when checking trades that sit near a date boundary.
Exporting your trade history to a spreadsheet
Need more than three months, or want a tidy file? That's what the export function is for.
1. The export button
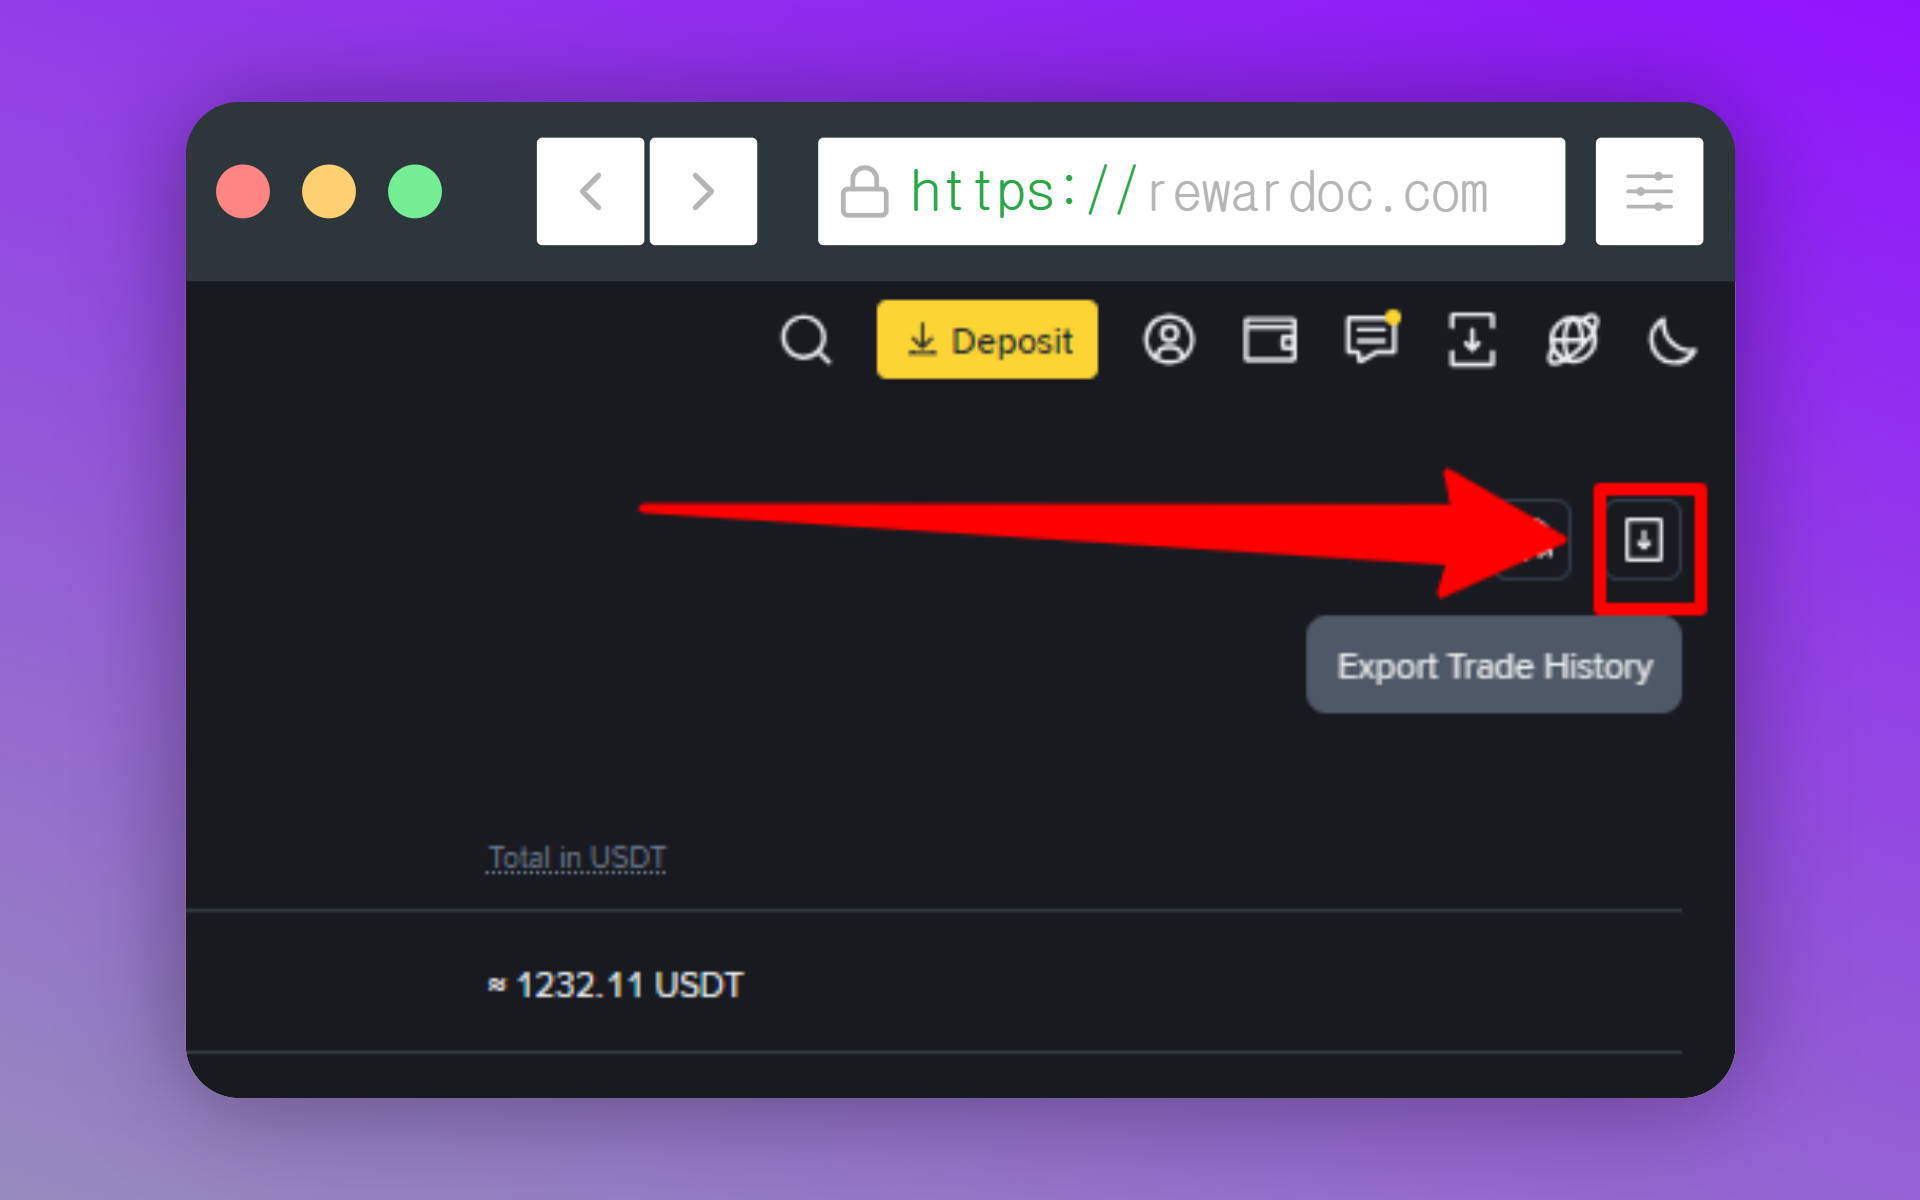
On the same screen where you looked up your history, click [Export Trade History] at the top right. It sits in the same place for both spot and futures.
2. Setting the period
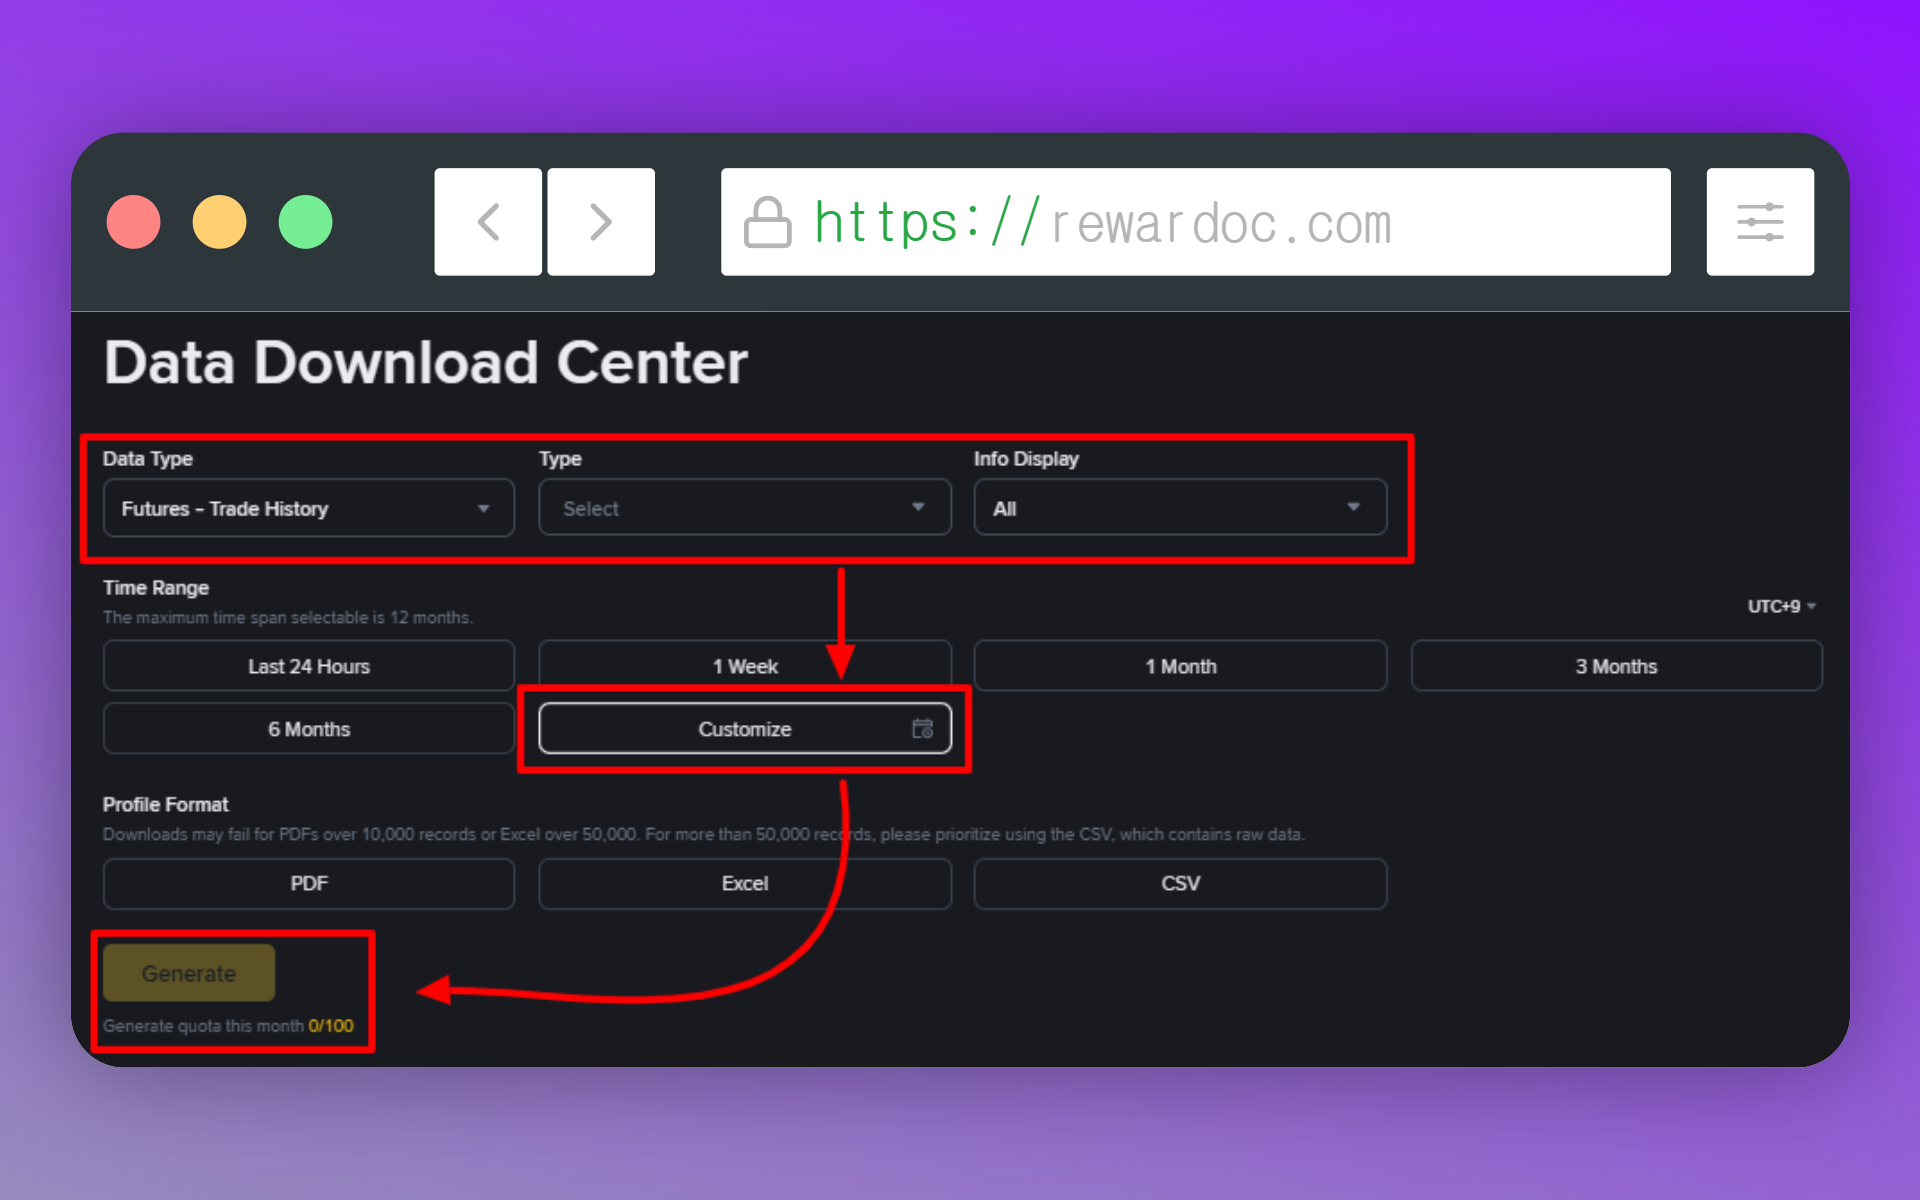
Set the period you want in the popup. Choose spot or futures under [Data type]. [Type] is the contract type — pick USDⓈ-M Futures or Coin-M Futures to match what you traded, and for anything beyond 6 months, choose [Customize]. [Info Display] is where you pick which fields appear in the file. Want everything including email and addresses? Leave it on [All].
The maximum range you can generate in one go is one year from the date you select. Pulling several years means splitting it into yearly chunks and running it multiple times.
One thing worth knowing here. You can generate between 30 and 100 statements per month. Botch the date range a few times and re-run it, and you'll burn through that allowance faster than you'd think — so set the range properly before you hit the button.
Binance's current trade history export policy states "5 times per month" or "15 to 40 times per month," but Binance may adjust the generation quota flexibly depending on server load, your account tier (VIP), or which specific menu you're using. Your remaining allowance shows at the bottom as "Generate quota this month 0/100," so check it there.)
3. Requesting generation
Pick your file format under [Profile Format] and click [Generate]. (You can save as PDF, Excel, or CSV.)
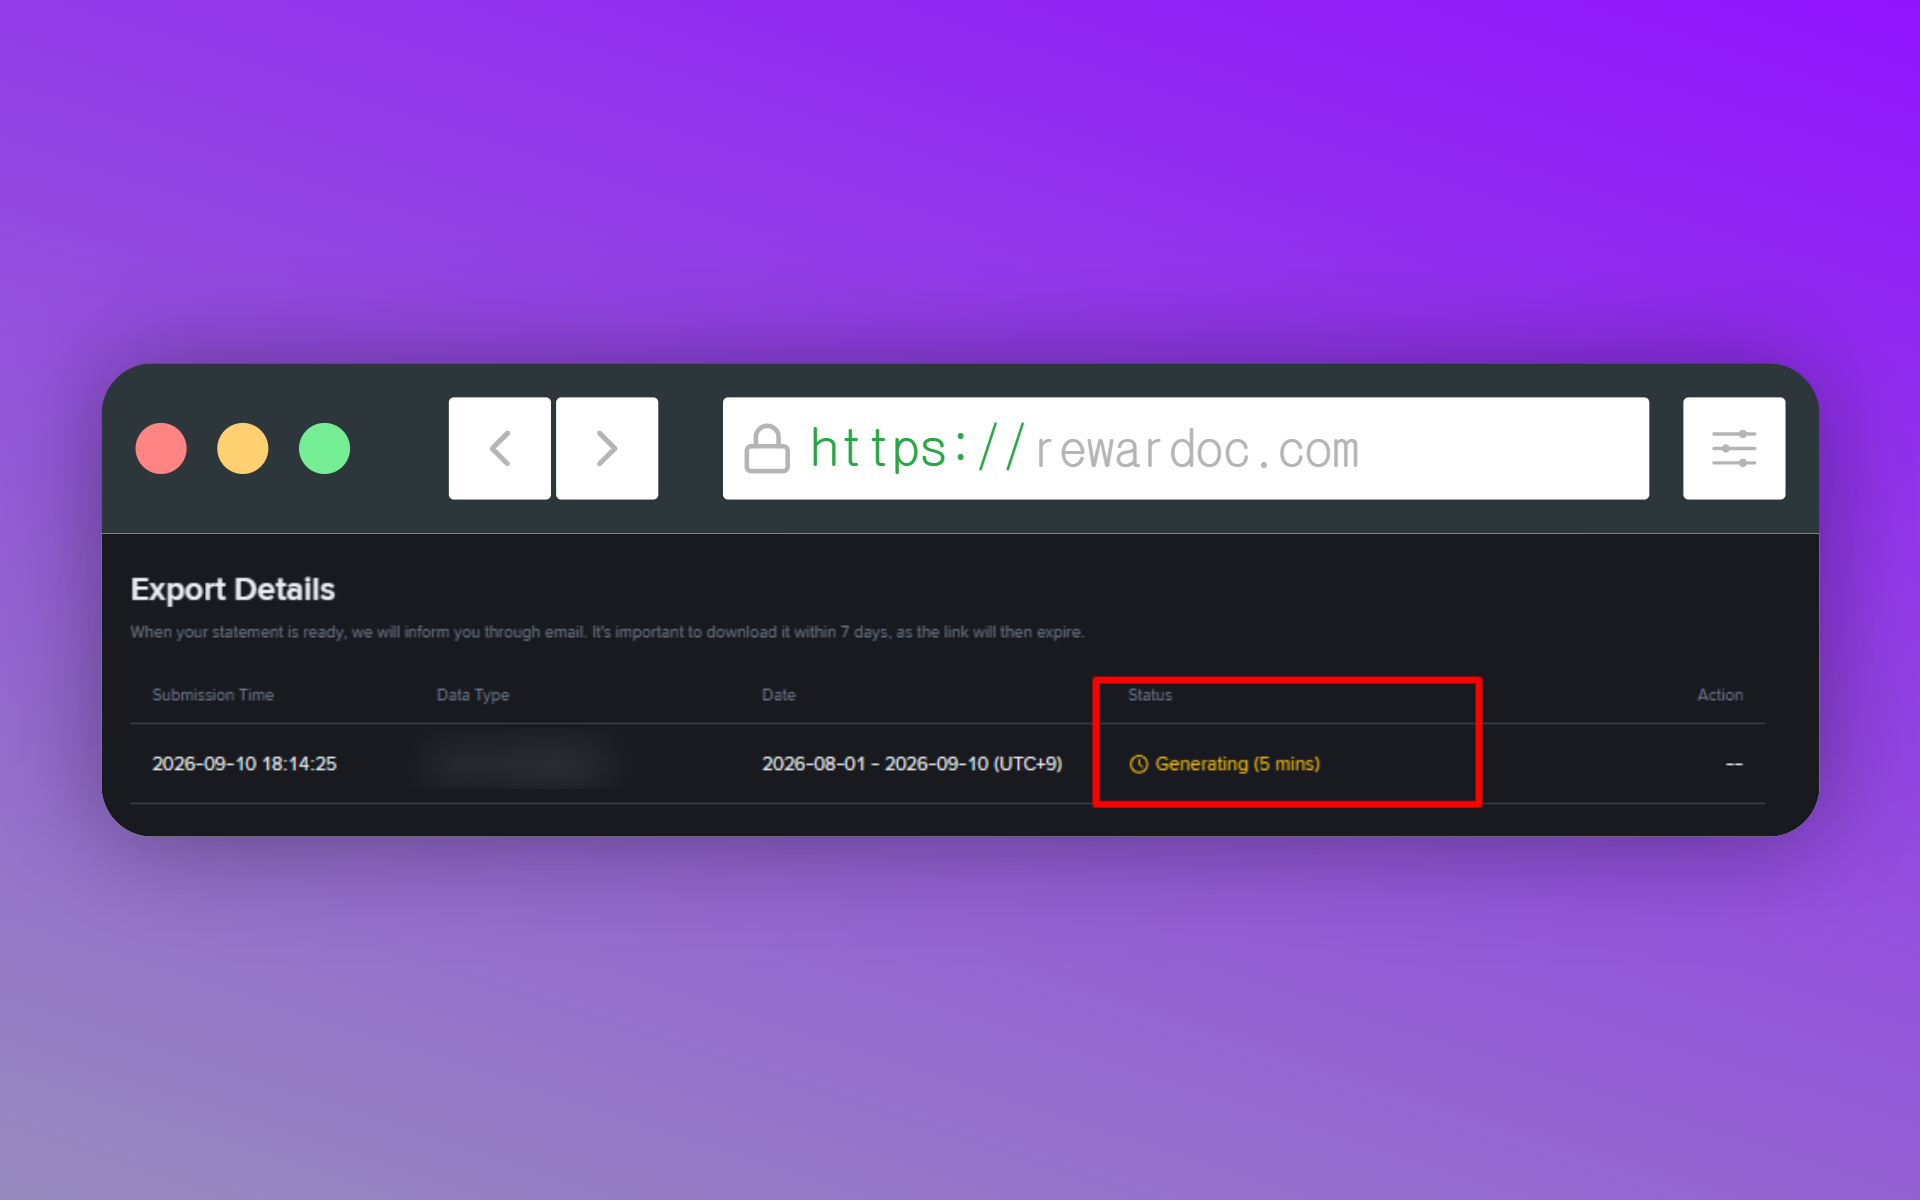
If you've traded a lot, generating the file can take around 10 minutes. The estimated wait shows under 'Status'.
4. Downloading
You get a notification once it's ready. Go back to the same popup, click [Download], and it saves as a CSV. The download link only lives for 7 days, so don't generate a file and forget about it — grab it while it's there.
- If the download won't work, there's a good chance you've used up this month's generation allowance.
- If you remember trading but nothing shows up, remember spot and futures have completely separate lookup screens. Check you picked the right one. (For futures, try both USDⓈ-M and COIN-M depending on what you traded.)
Getting it from the mobile app
In the app, go to the [Trade] screen, tap the order icon in the [Open Orders] area, then in the [Trade History] tab tap the download icon at the top right.
Anything within 6 months downloads immediately, capped at 10,000 records per pull. Go beyond 6 months and, same as on web, you submit a generation request and wait a bit.