How to Trade Binance Futures (A Beginner's Guide from Deposit to Close)
New to futures on Binance? Moving USDT from your spot wallet, entering long and short positions, setting TP/SL, and closing out — all walked through with screenshots at a beginner's pace.

This guide walks through Binance futures trading from a beginner's point of view, start to finish: moving USDT from your spot wallet into your futures wallet, actually opening a position — long or short — setting take profit and stop loss, and finally closing the whole thing out.
💡 Quick note before you start!
- No Binance account yet? 👉 [How to sign up for Binance]
- New user bonus + fee discount campaign 👉 [Check the signup bonuses]
Your futures wallet is separate from your spot wallet
The spot wallet is where you buy coins and just hold them. You lose what you put in, you gain what you put in. The futures wallet is a margin account. Money sitting there isn't buying coins — it's collateral backing a bet you've placed on direction. That's exactly why the two wallets are kept apart.
Opening a futures account and moving funds
1. Getting to the futures menu
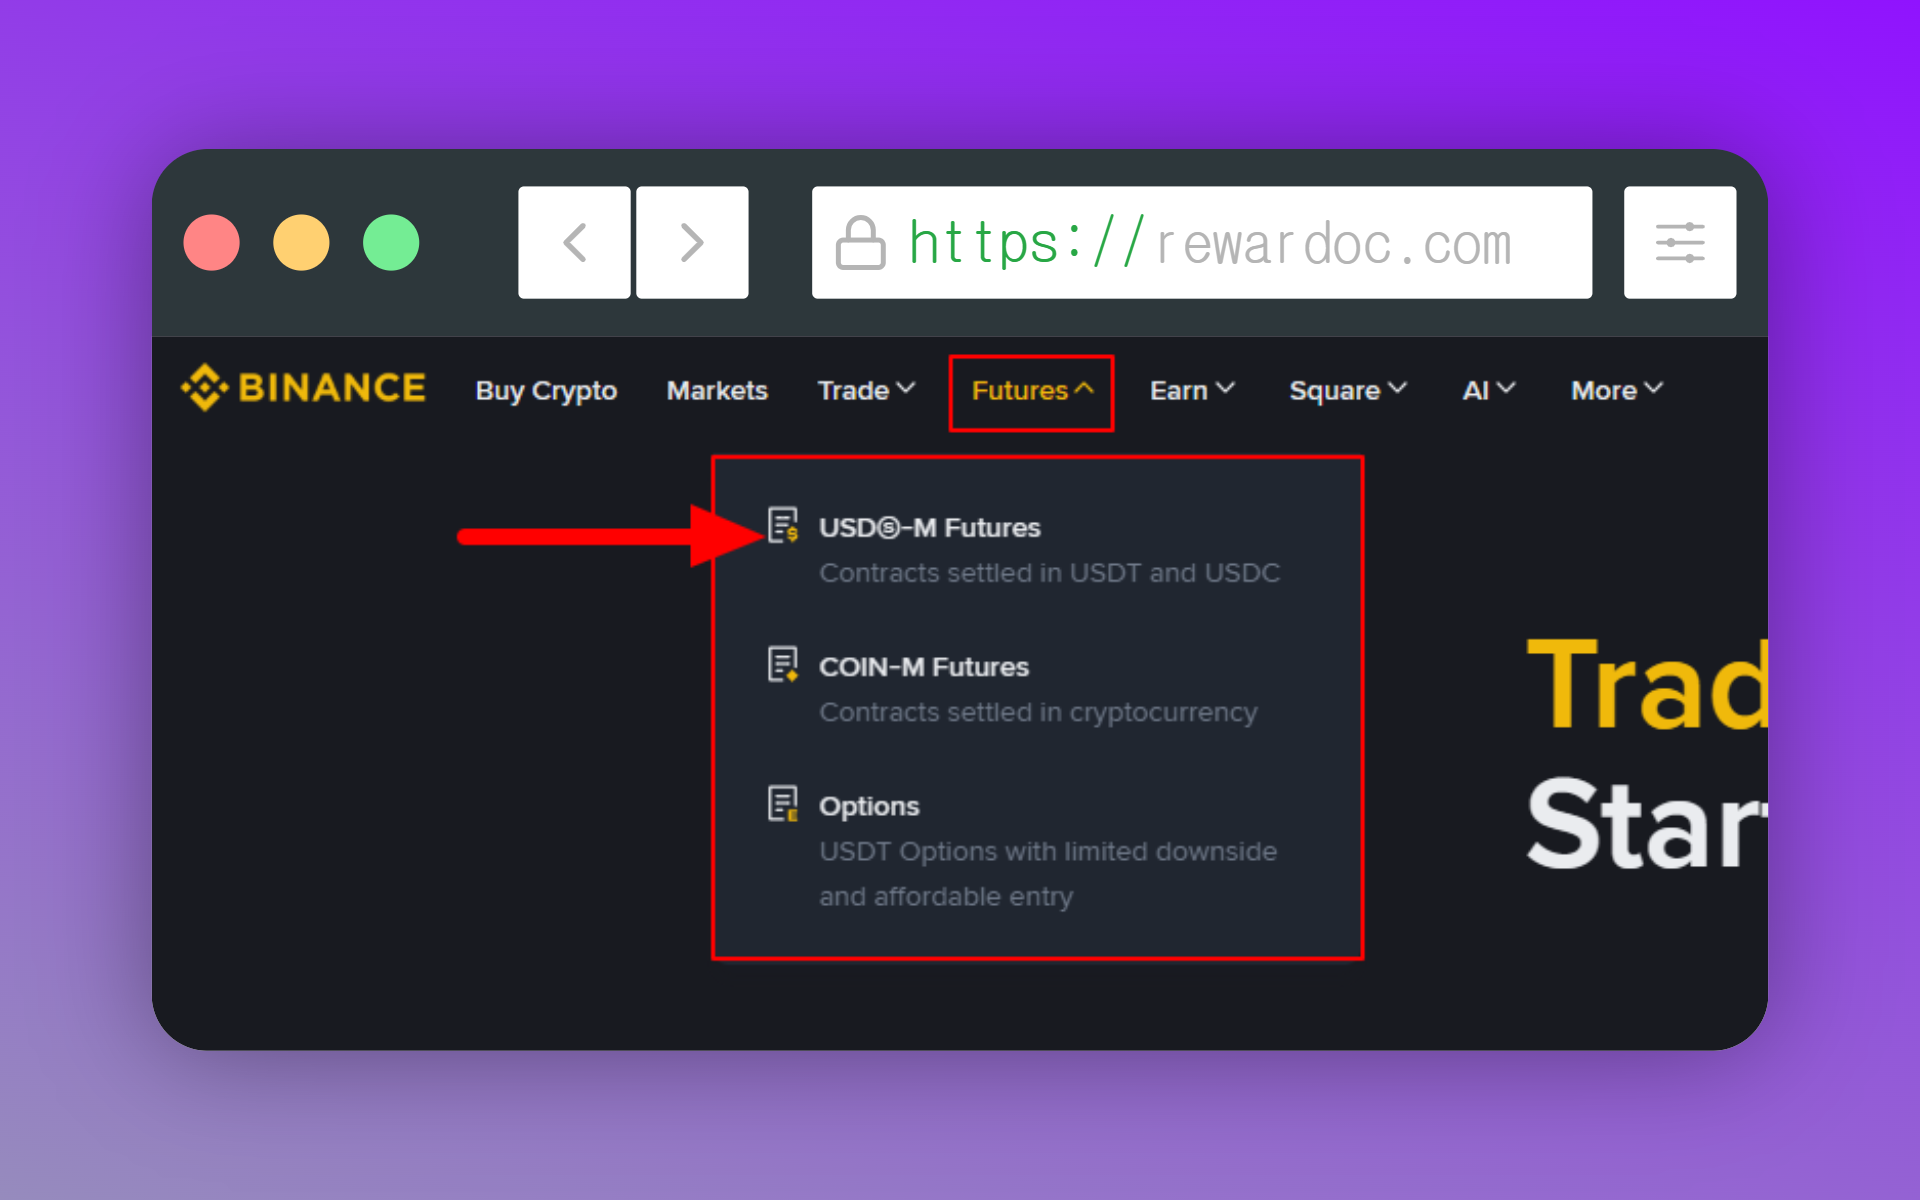
Click [Futures] in the top menu, then select [USD-M Futures]. USD-M is the market that uses USDT as margin; COIN-M uses the coin itself. COIN-M means posting BTC, ETH, or another crypto as collateral, and under normal circumstances you'll almost never touch it. The volume and the information are all concentrated on the USD-M side.
2. The account activation quiz
If futures is new to you, an intro screen appears. Click [Open Now] or [Start Quiz] and answer the questions. It's asking things like what leverage is and when liquidation happens — nothing heavy. (Depending on the account, this may not appear at all.)
3. Reaching the trading screen
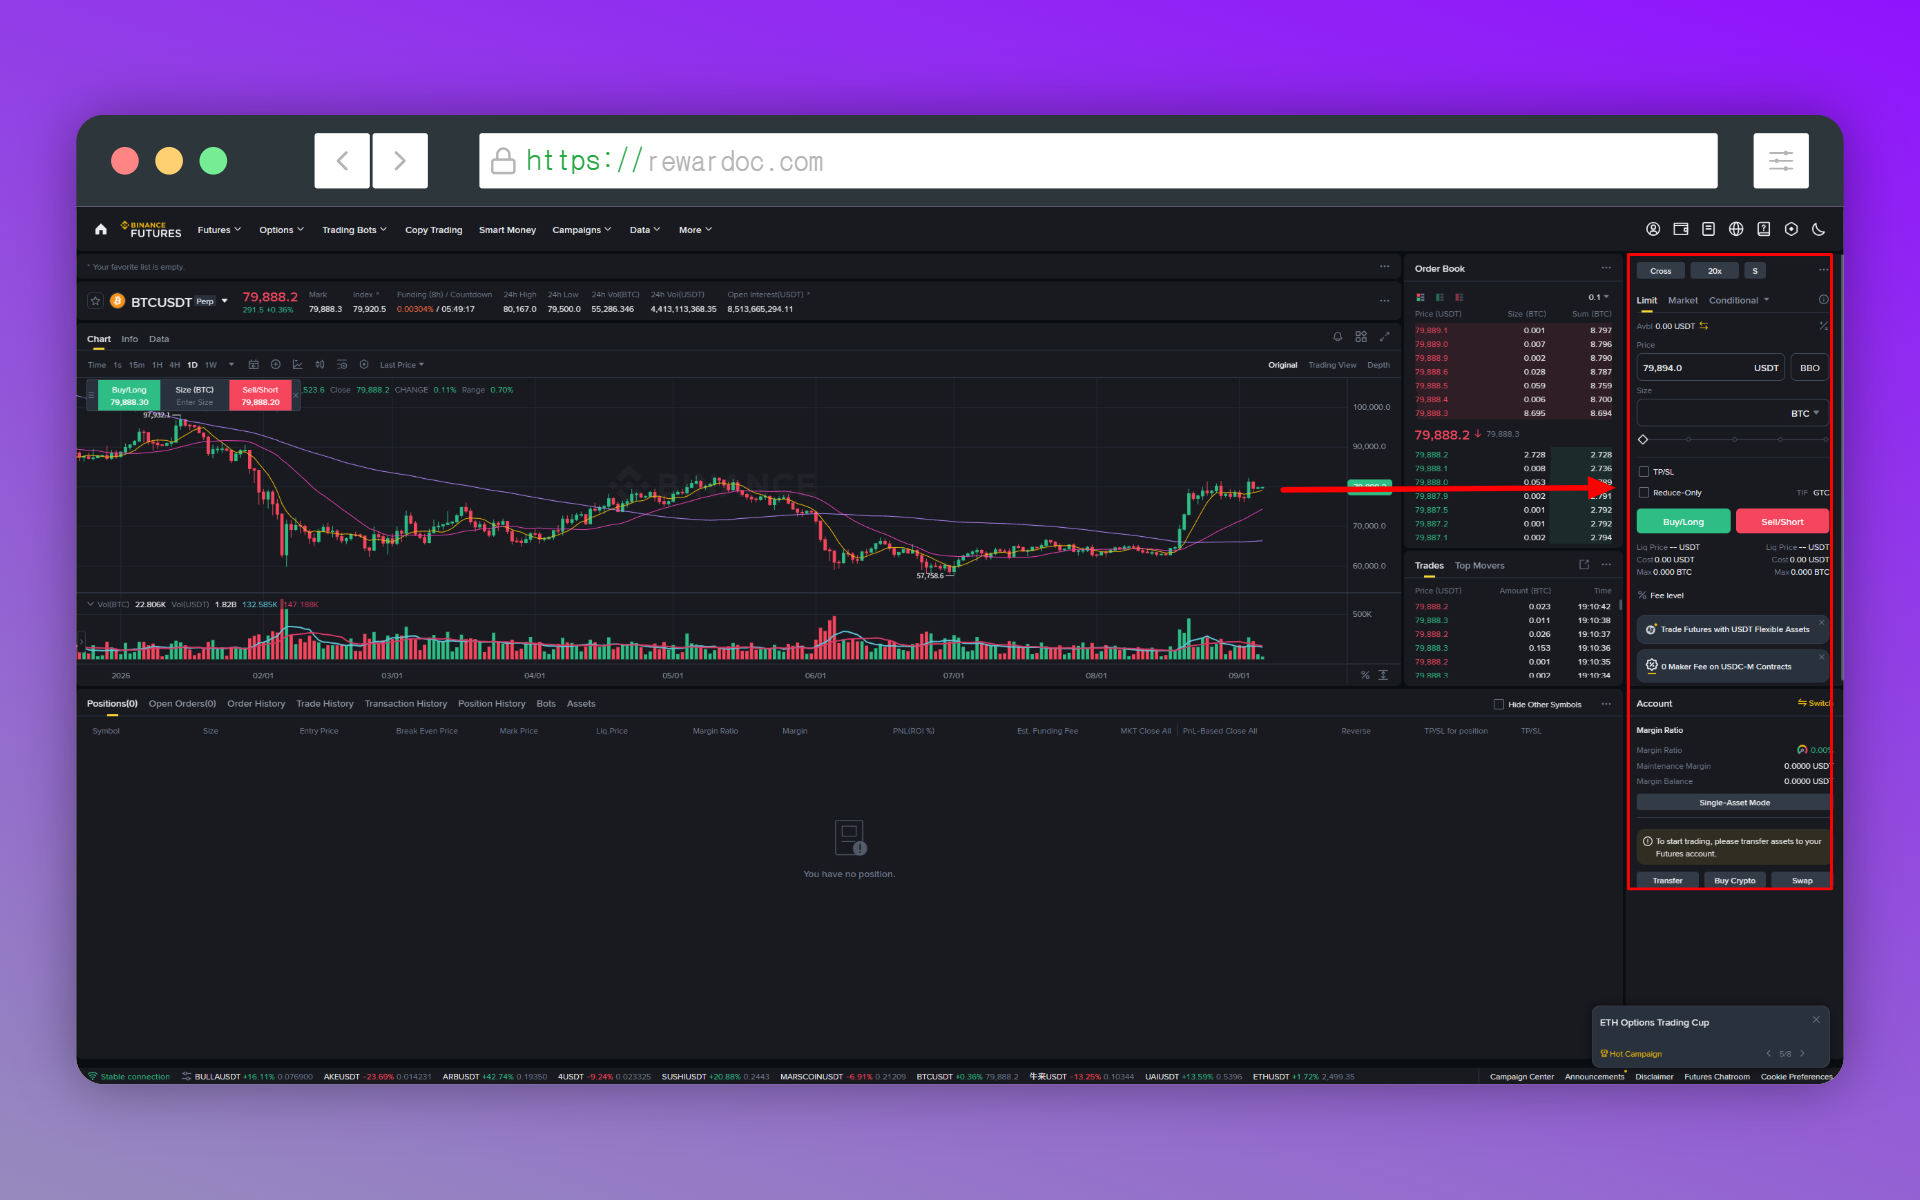
Pass the quiz and you land straight on the futures trading page. The candle chart is packed with numbers and it looks overwhelming at first glance, but the only thing you actually operate is the order panel on the right.
4. Moving funds into the futures account
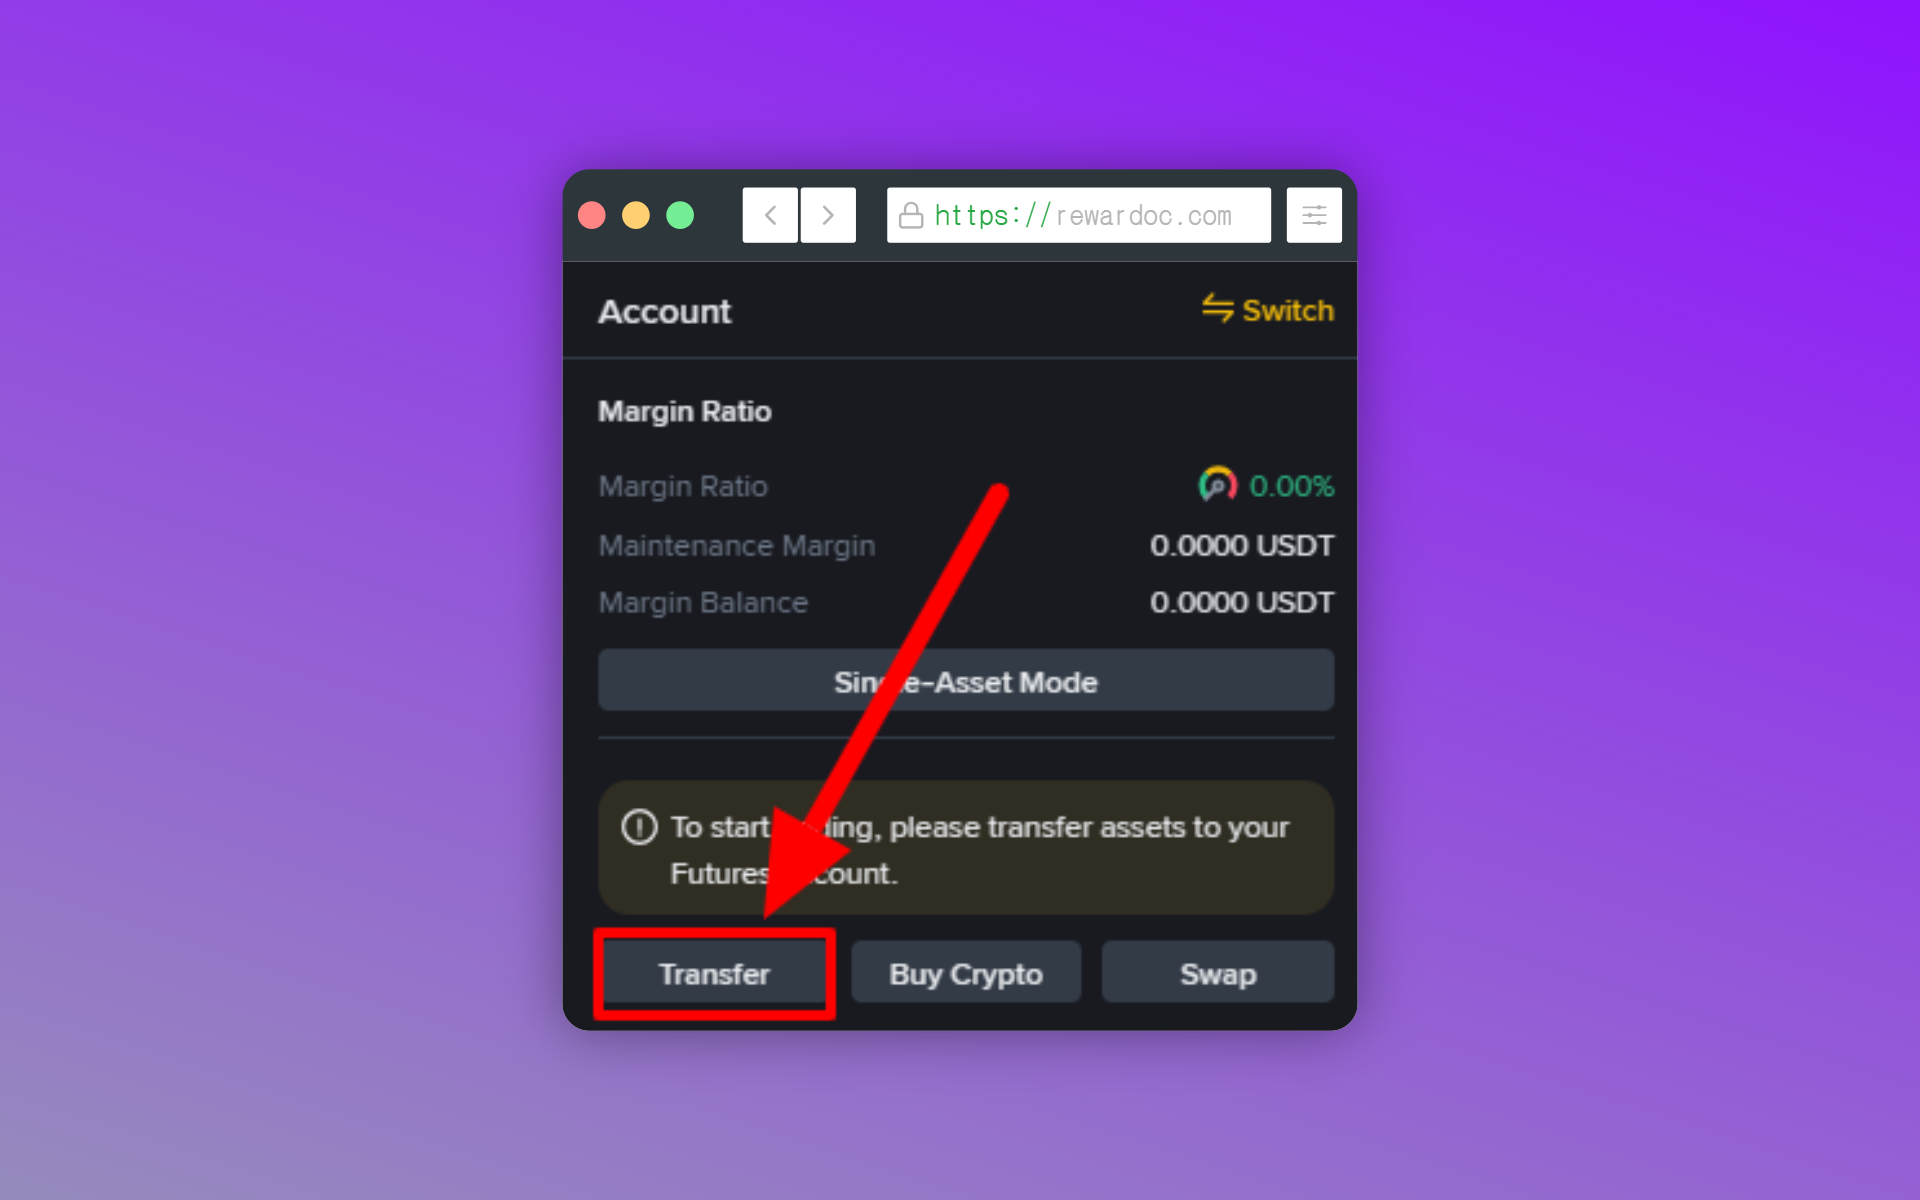
At the bottom of the right-hand order panel, in the [Account] area, there's a [Transfer] button. On mobile it's in the same place by name, at the bottom right of the futures screen or in the assets area. Seeing a balance of 0.00 USDT is normal — you haven't moved anything over from spot yet.
5. Checking the transfer direction
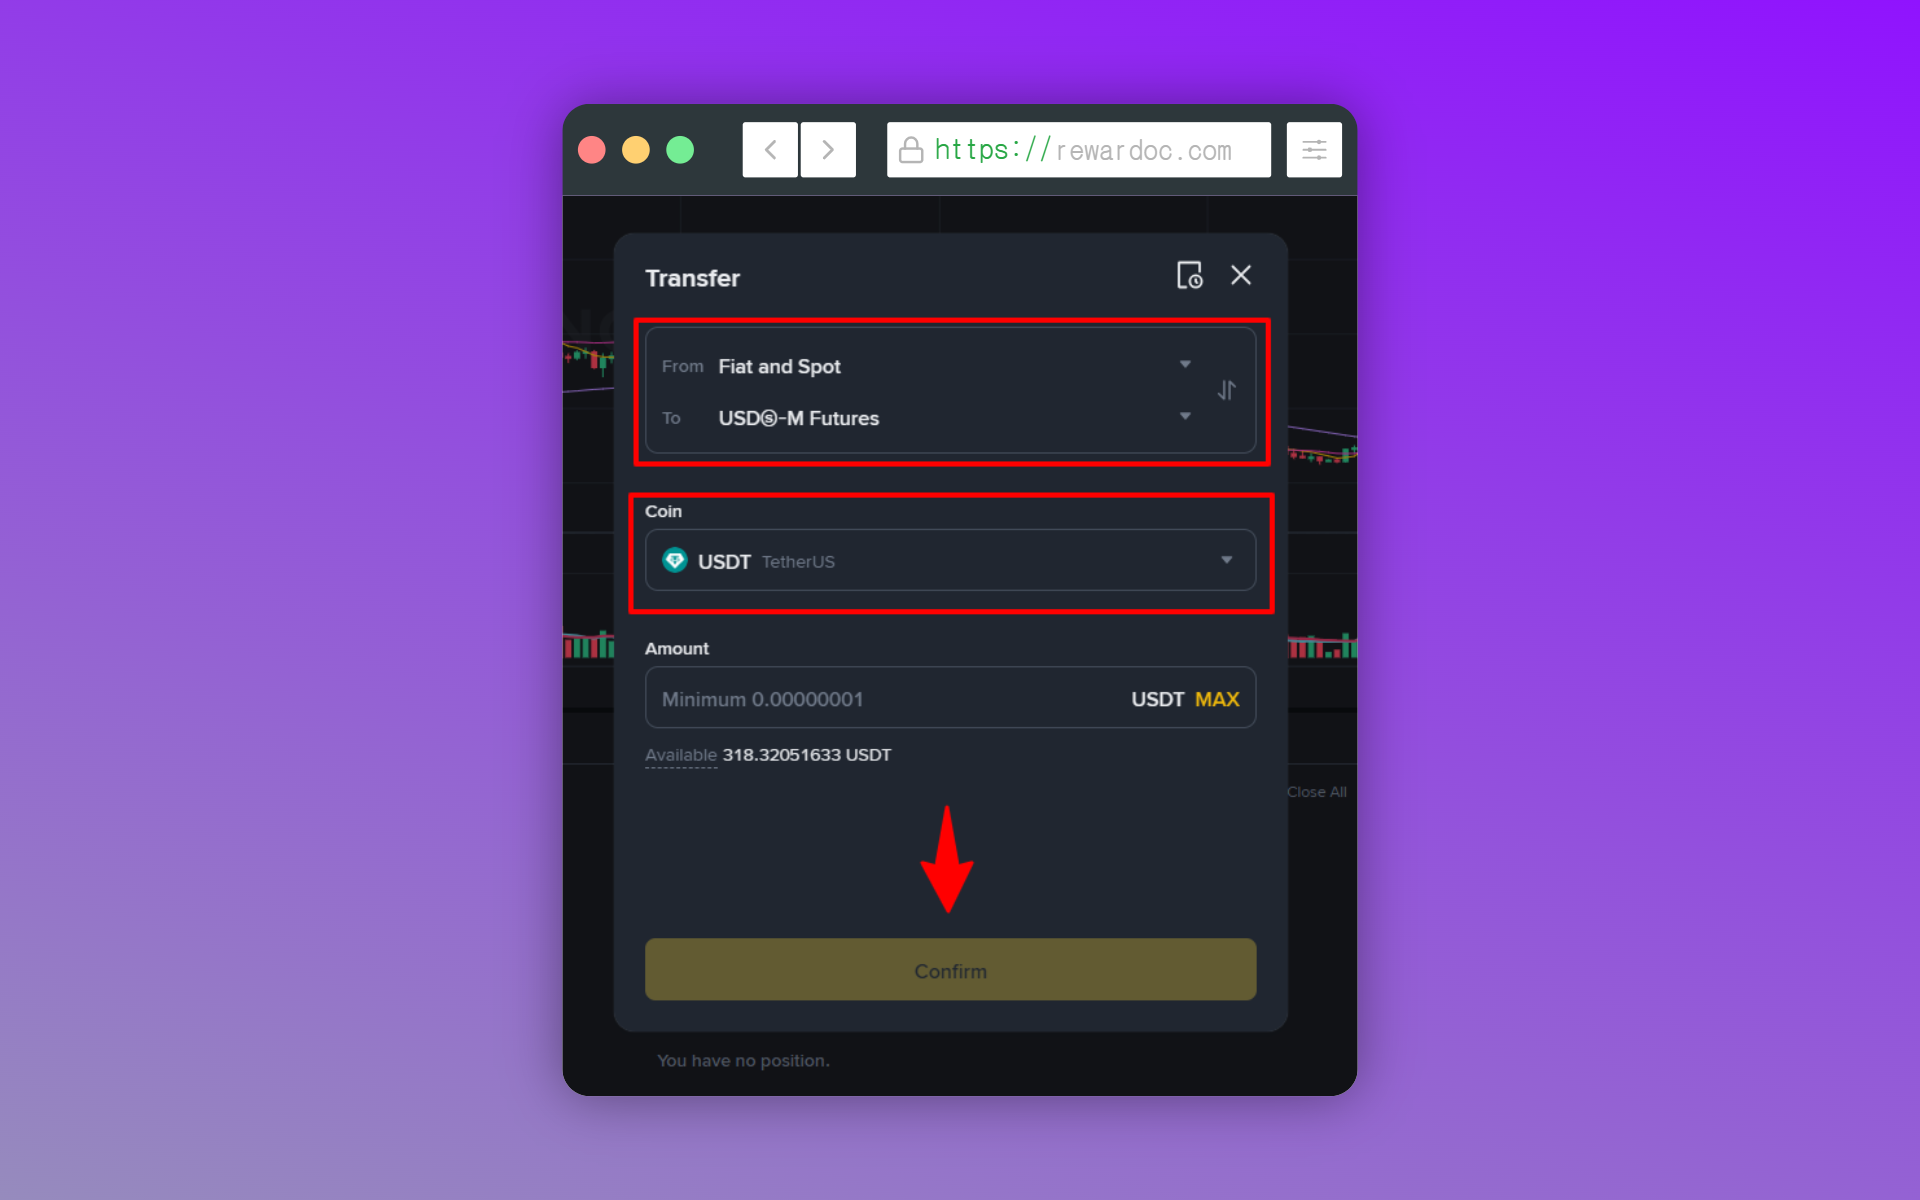
When the popup opens, set From to [Spot] and To to [USD-M Futures]. There's an arrow to flip the direction. If you've got a balance in spot but keep getting "insufficient balance," check whether the direction is reversed.
6. Entering an amount and transferring
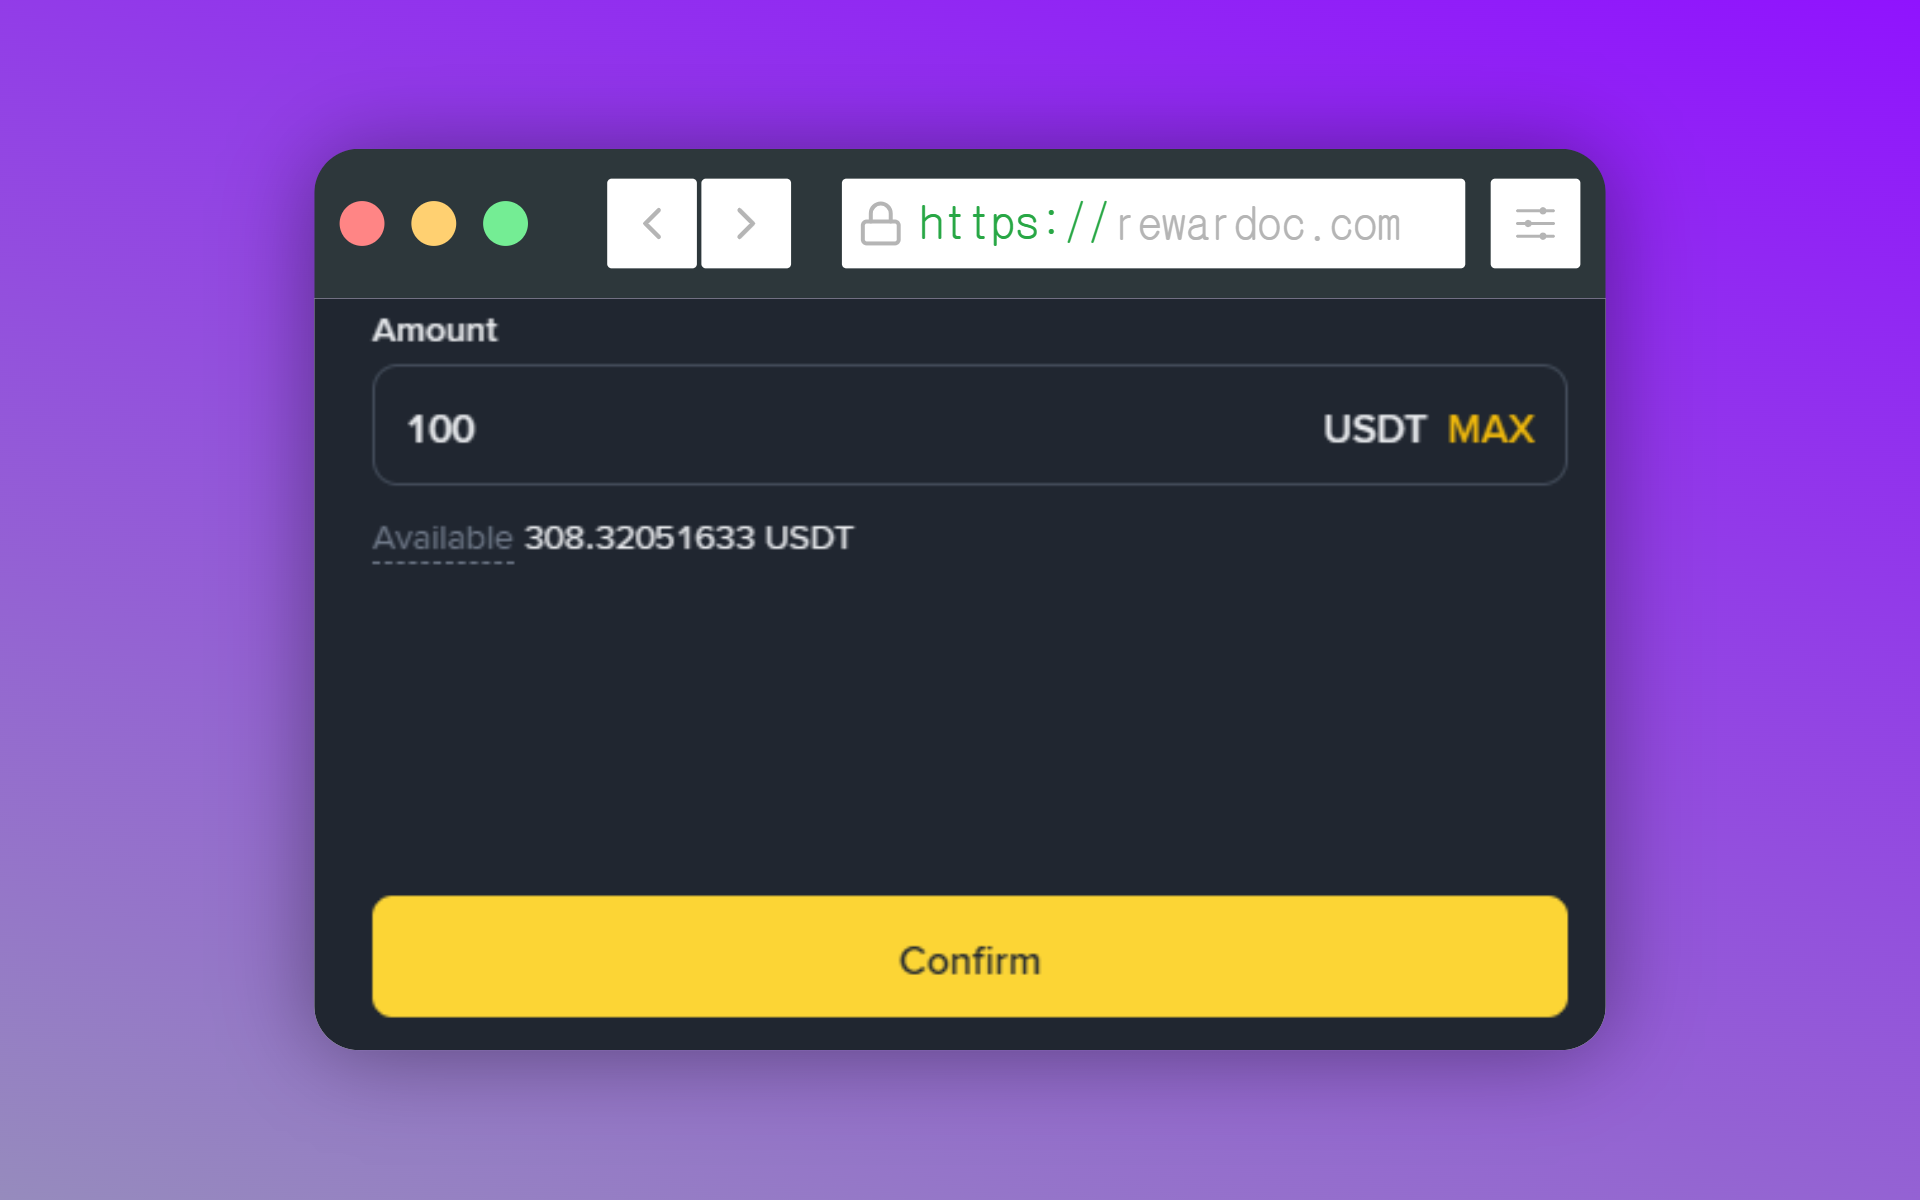
Leave the coin as [USDT], type in an amount, and hit [Confirm]. There's no transfer fee and it reflects instantly. Hit [Max] and everything in your spot account moves to futures.
7. Confirming the balance
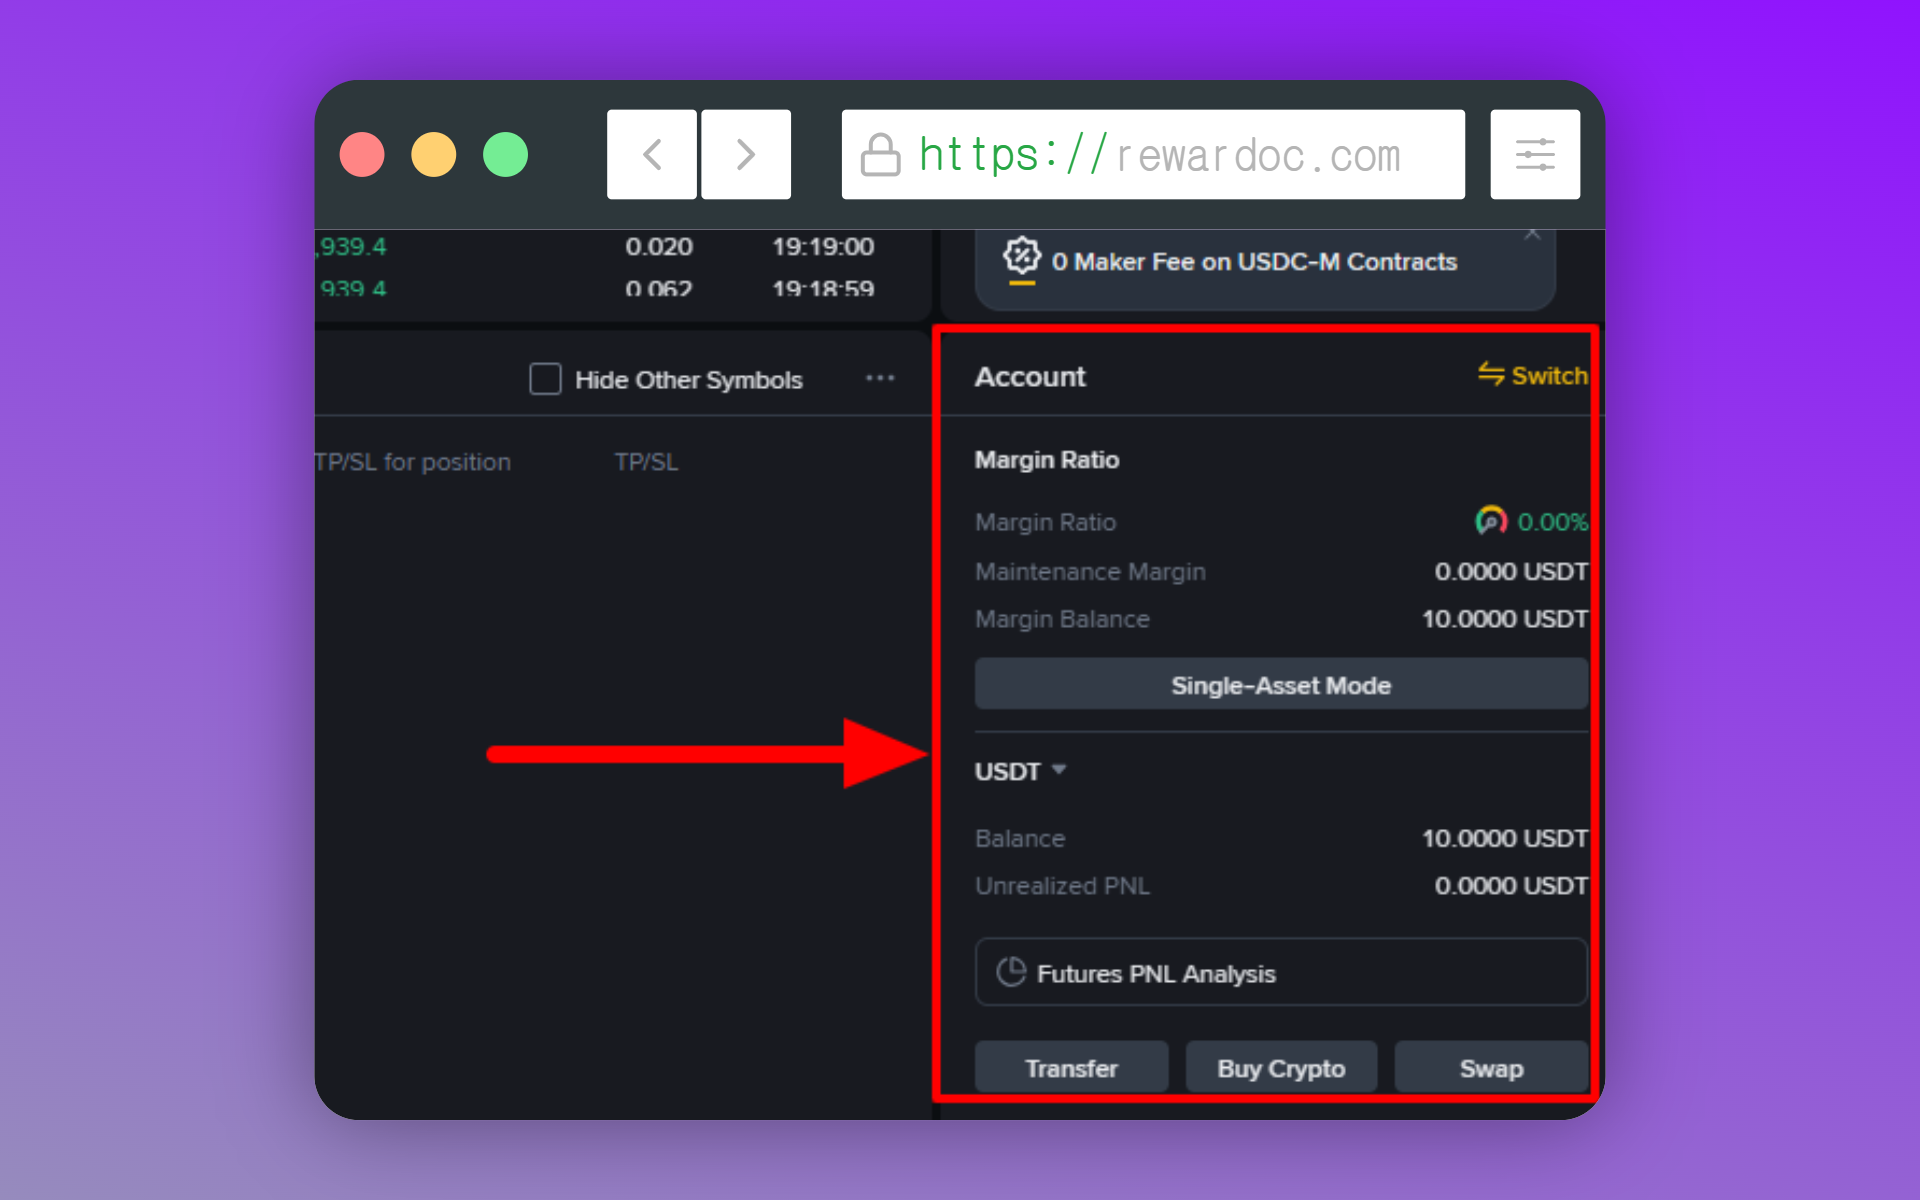
Check [Account] below the order panel to confirm the balance now matches what you just sent. The [Avbl] figure at the top gives you a quick read on your current balance.
Setup before ordering
1. Choosing a market
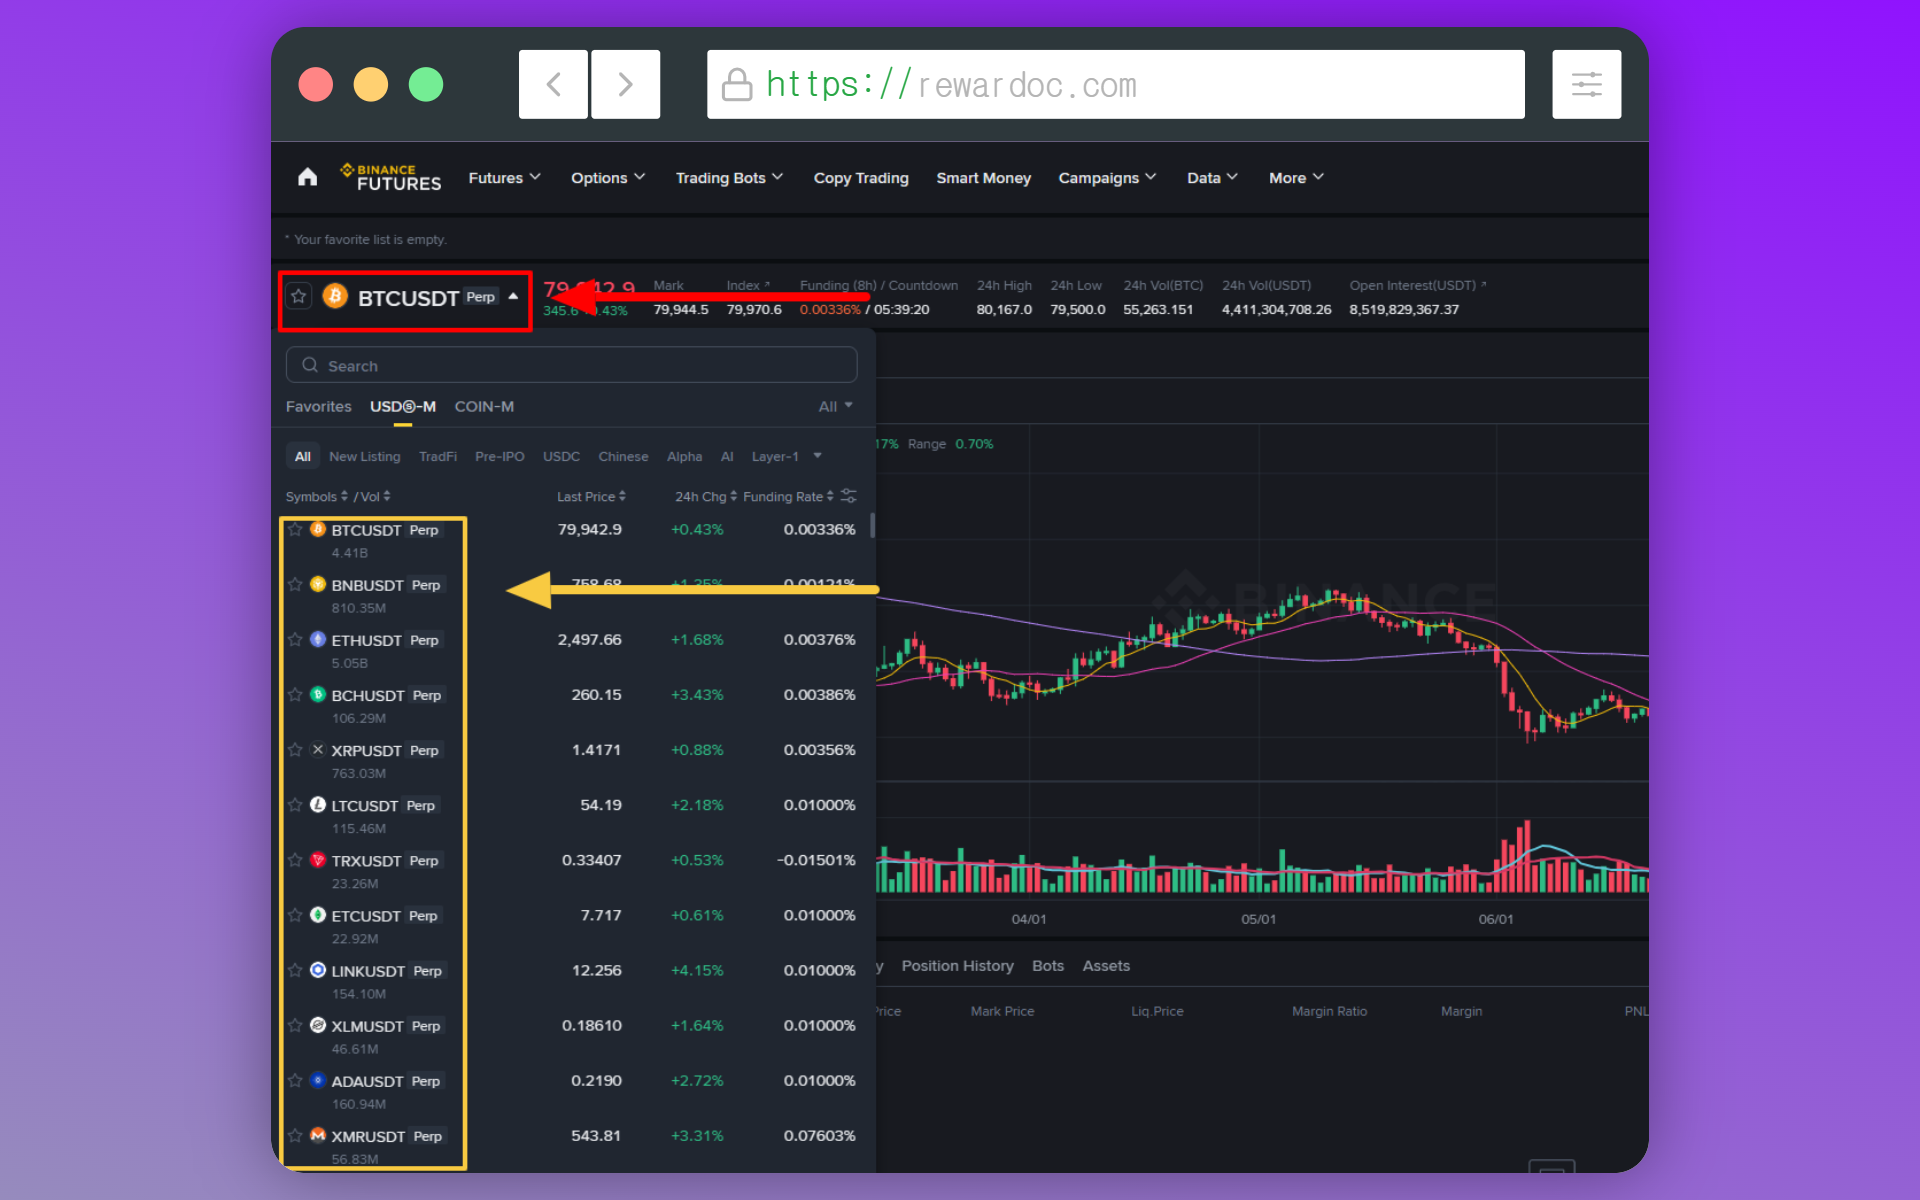
Click the market name at the top left to pick the pair you want to trade. You'll see things like BTC/USDT or ETH/USDT. That's what's called a trading pair.
Put simply, it tells you "which coin's price movement (left) am I betting on, measured against which asset (right)?" A pair is two symbols split by a slash (/).
- The coin in front (base asset): the thing you're actually trading. (e.g. BTC, ETH, SOL)
- The coin behind (quote asset): the 'currency' the price is measured in. (e.g. USDT, USDC, USD)
2. Setting the margin mode
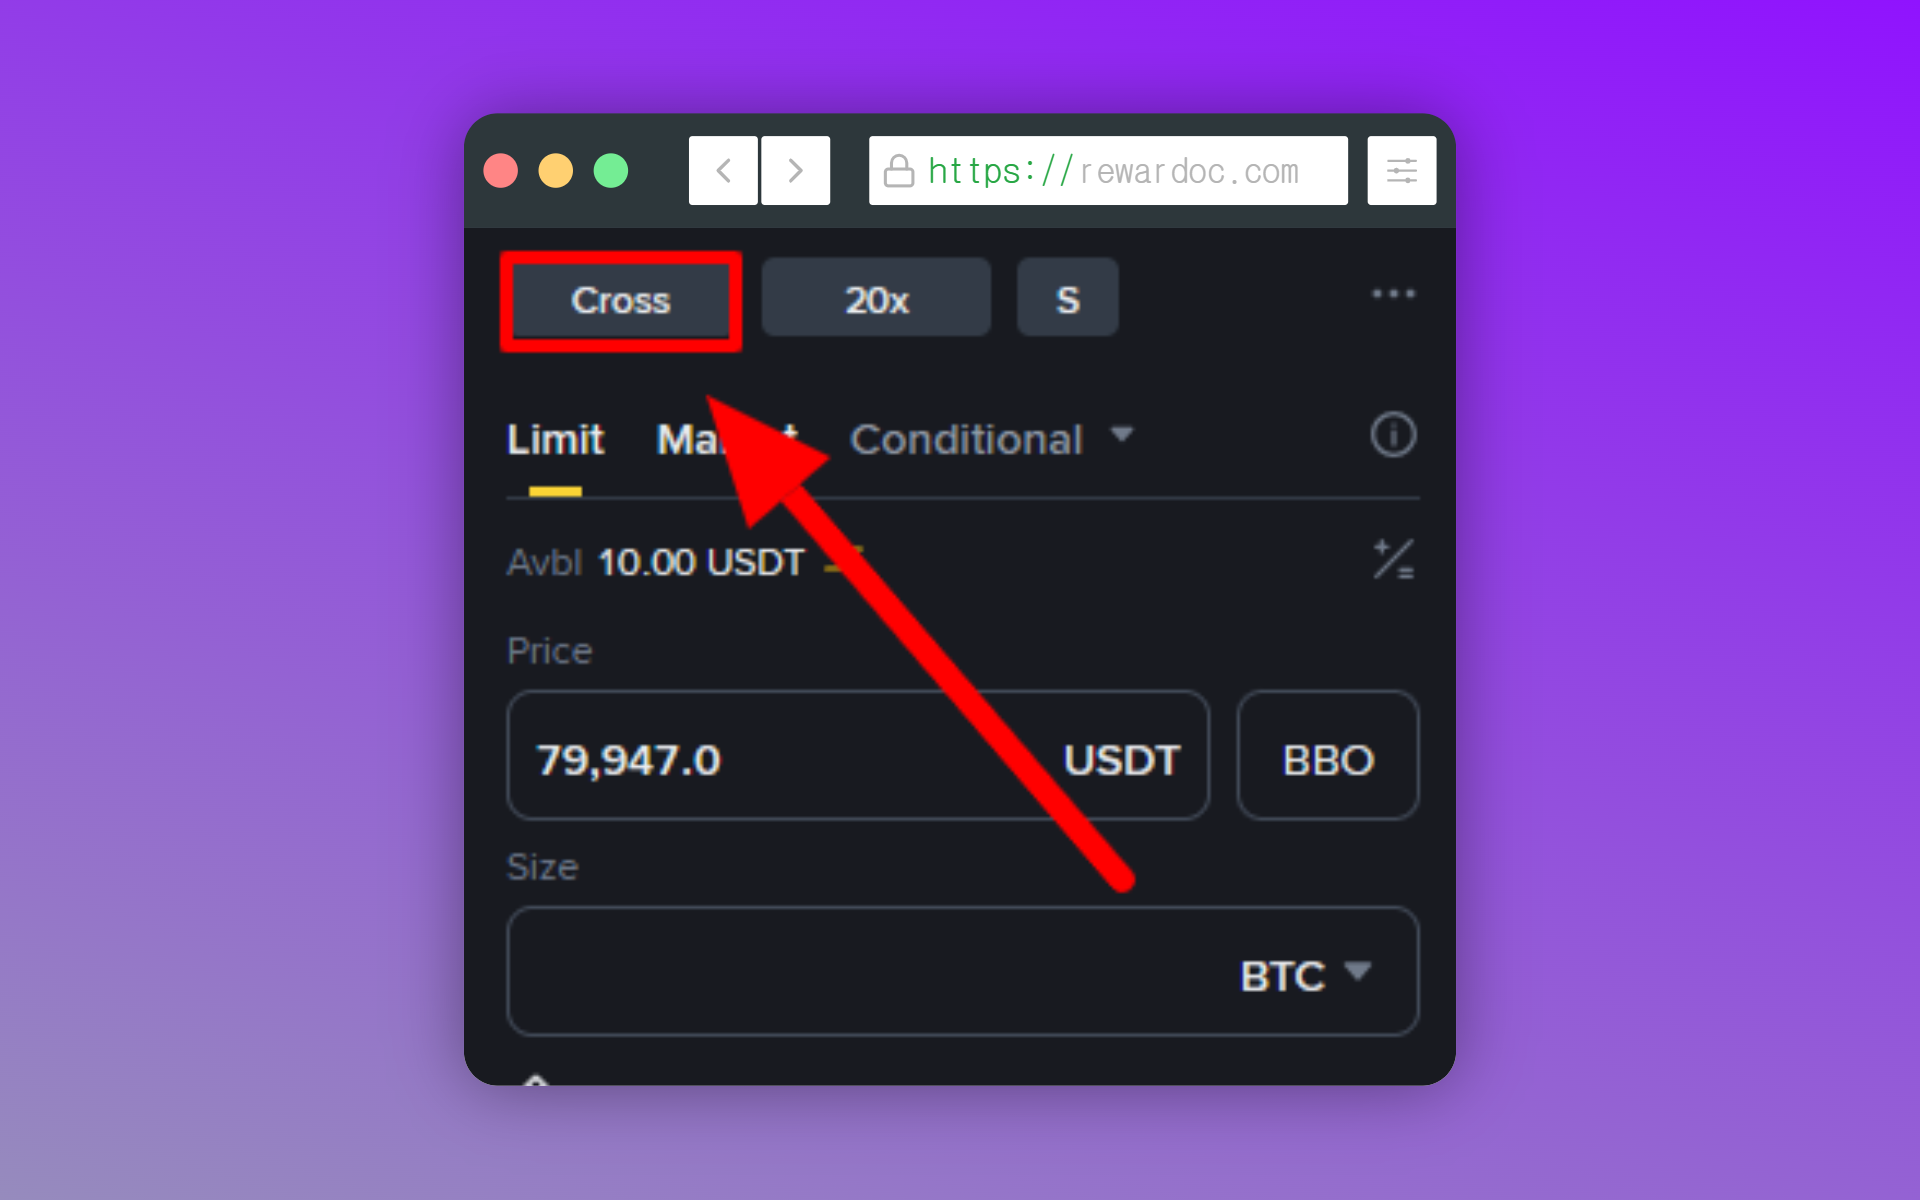
Click the [Cross] or [Isolated] label at the top of the order panel and a popup opens where you set the margin mode.
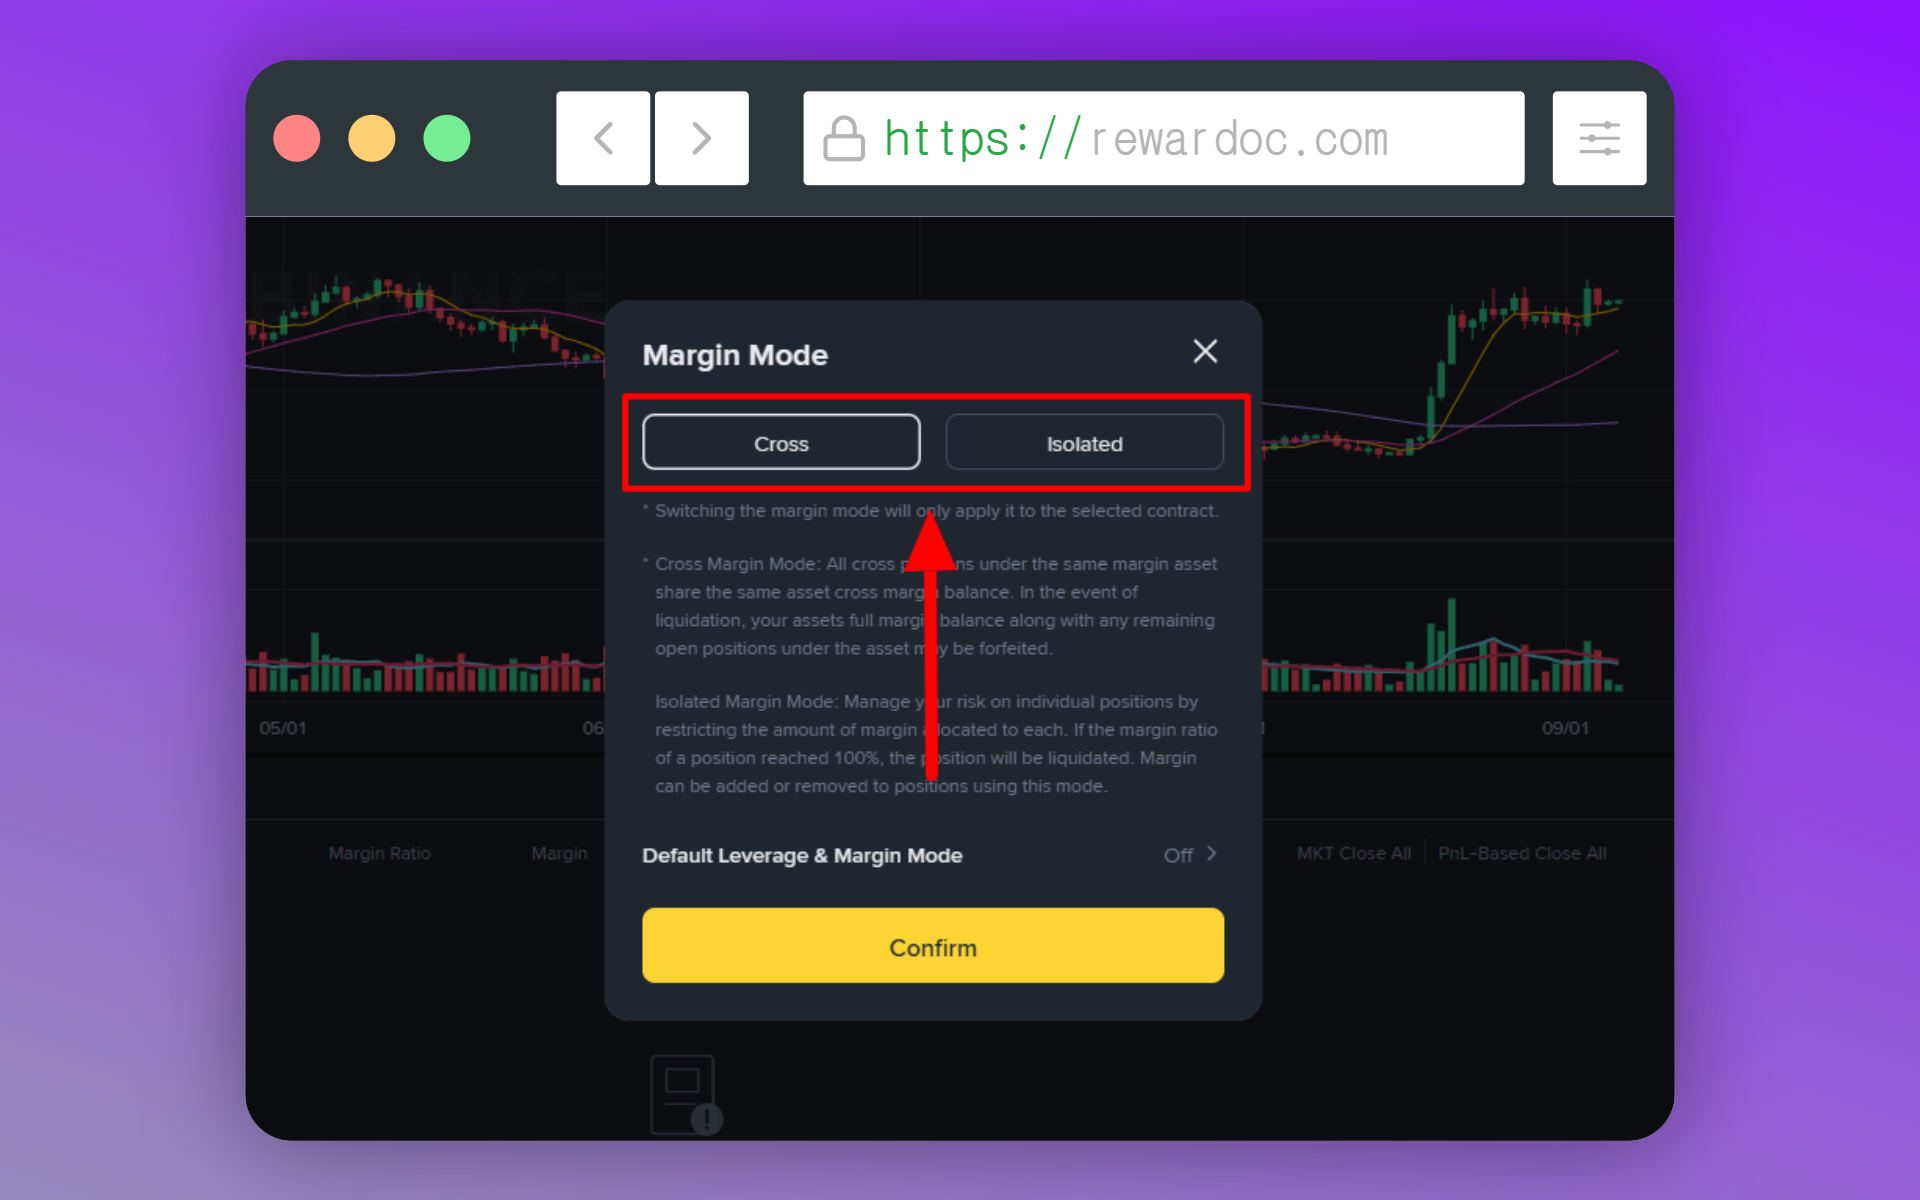
Cross shares your entire futures wallet as margin. Isolated exposes only the amount you committed to that specific position.
3. Setting leverage
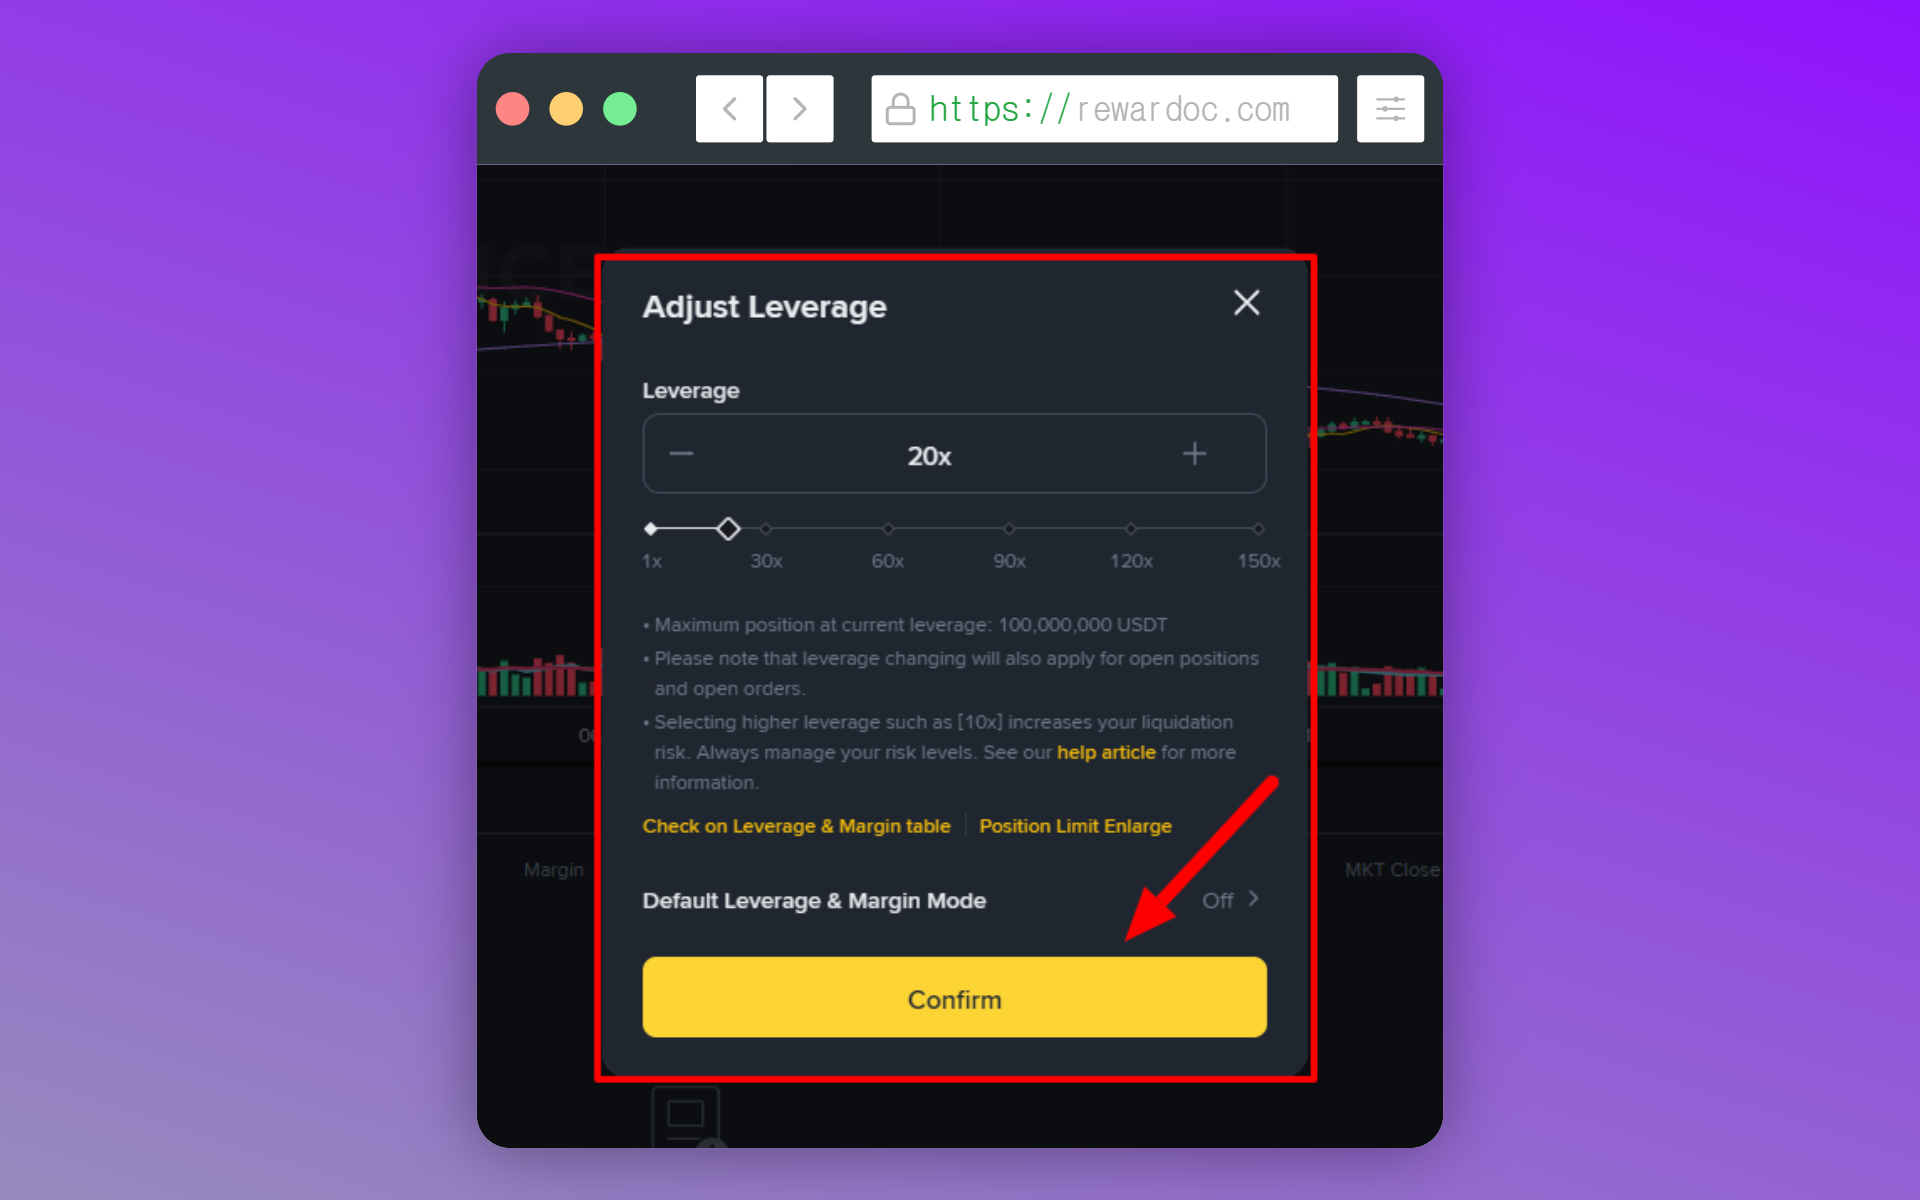
Next to the margin mode button is a spot reading [20x] — that's where you set your leverage multiplier. The default is 20x. Click it, drag the slider to the multiplier you want, then hit [Confirm] to apply it.
Placing your first trade (long and short orders)
When you enter a futures trade, that's called a 'position'. Whether you go long (buy) or short (sell), you're entering a trade — and that open, not-yet-closed contract is what everyone means by a position.
1. Choosing an order type
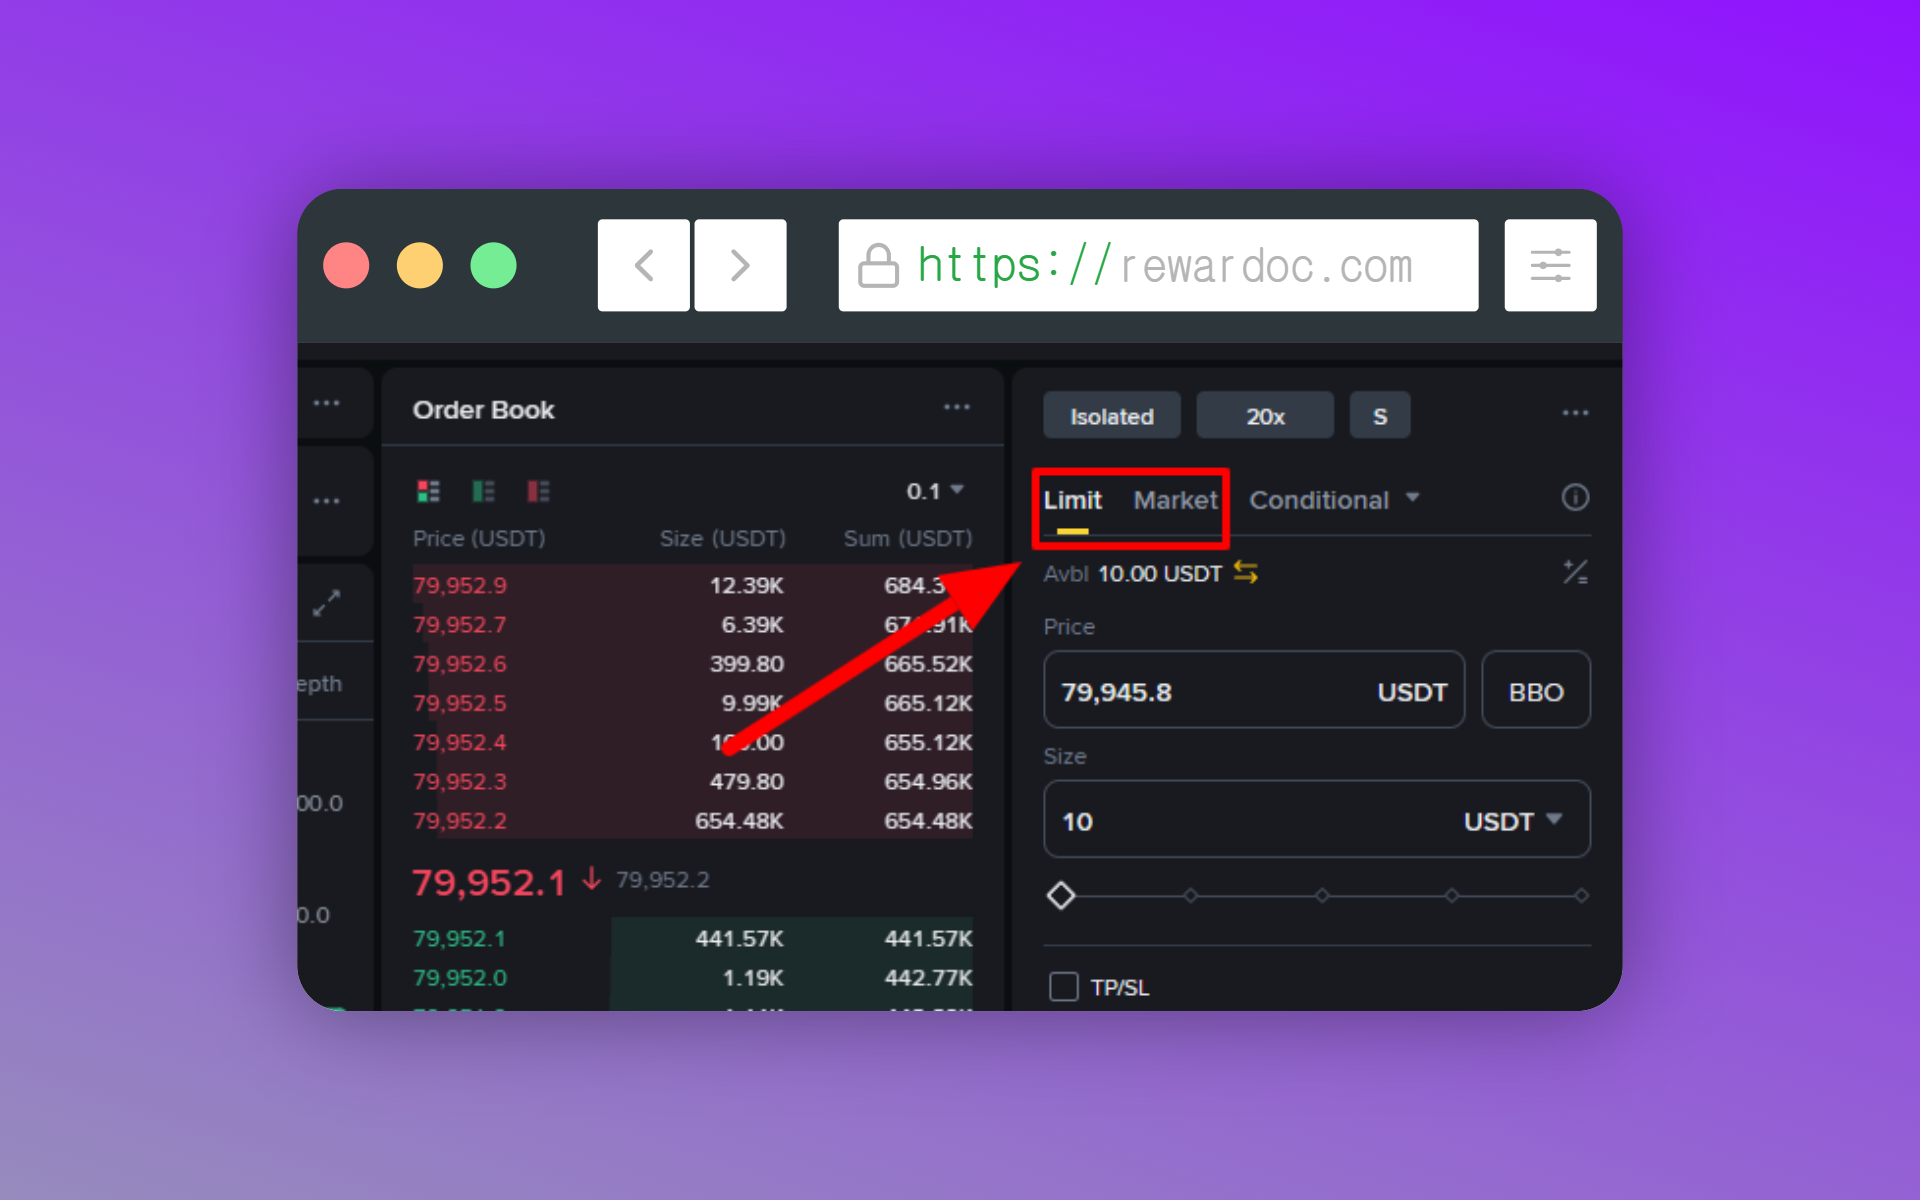
Pick [Limit] or [Market] from the tabs at the top of the order panel. Limit means you name your price and wait, while Market fills you immediately at whatever's on the book right now.
2. Entering size
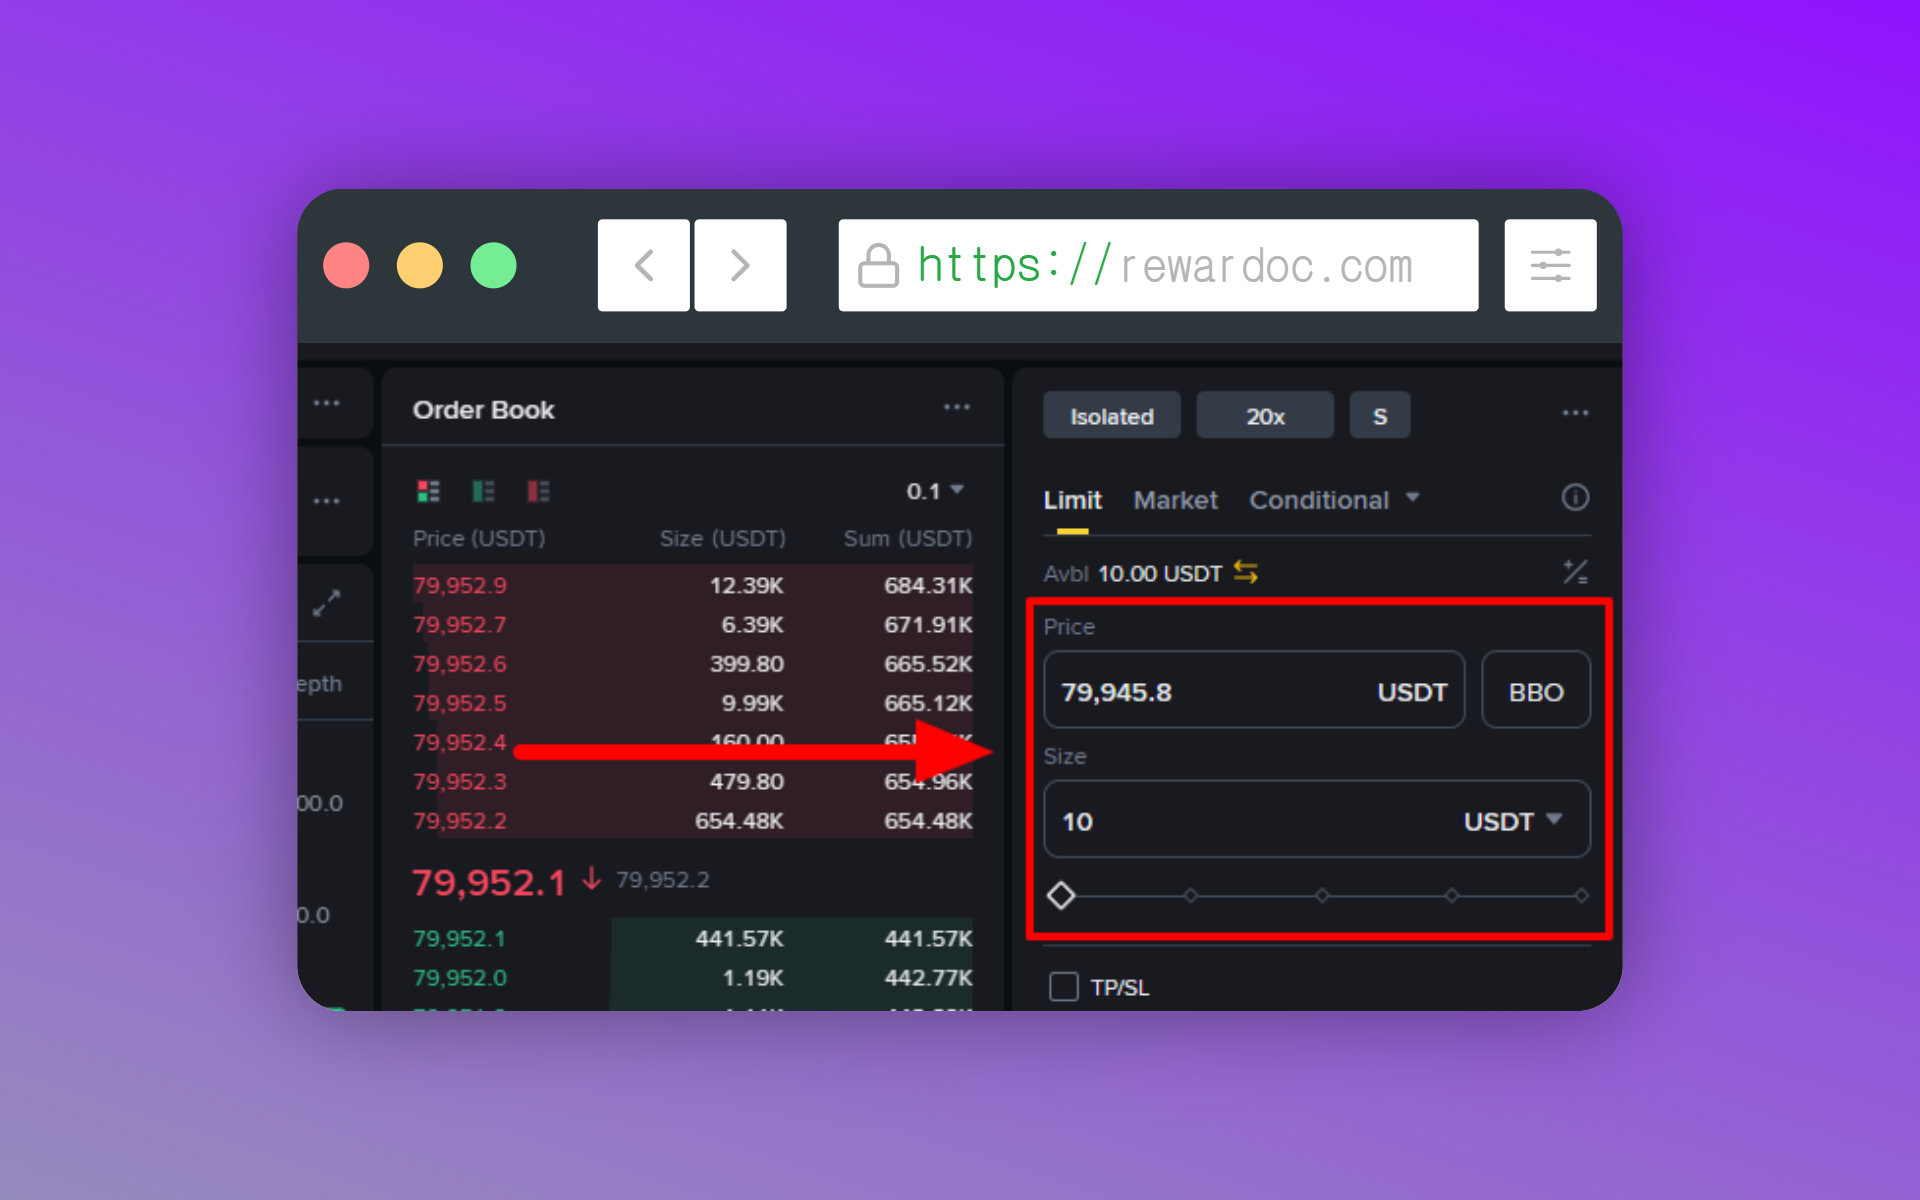
Put your order price in [Price] and how much you want to trade in [Size]. (If typing exact numbers is awkward, drag the percentage slider under the size field to scale the order against your balance.)
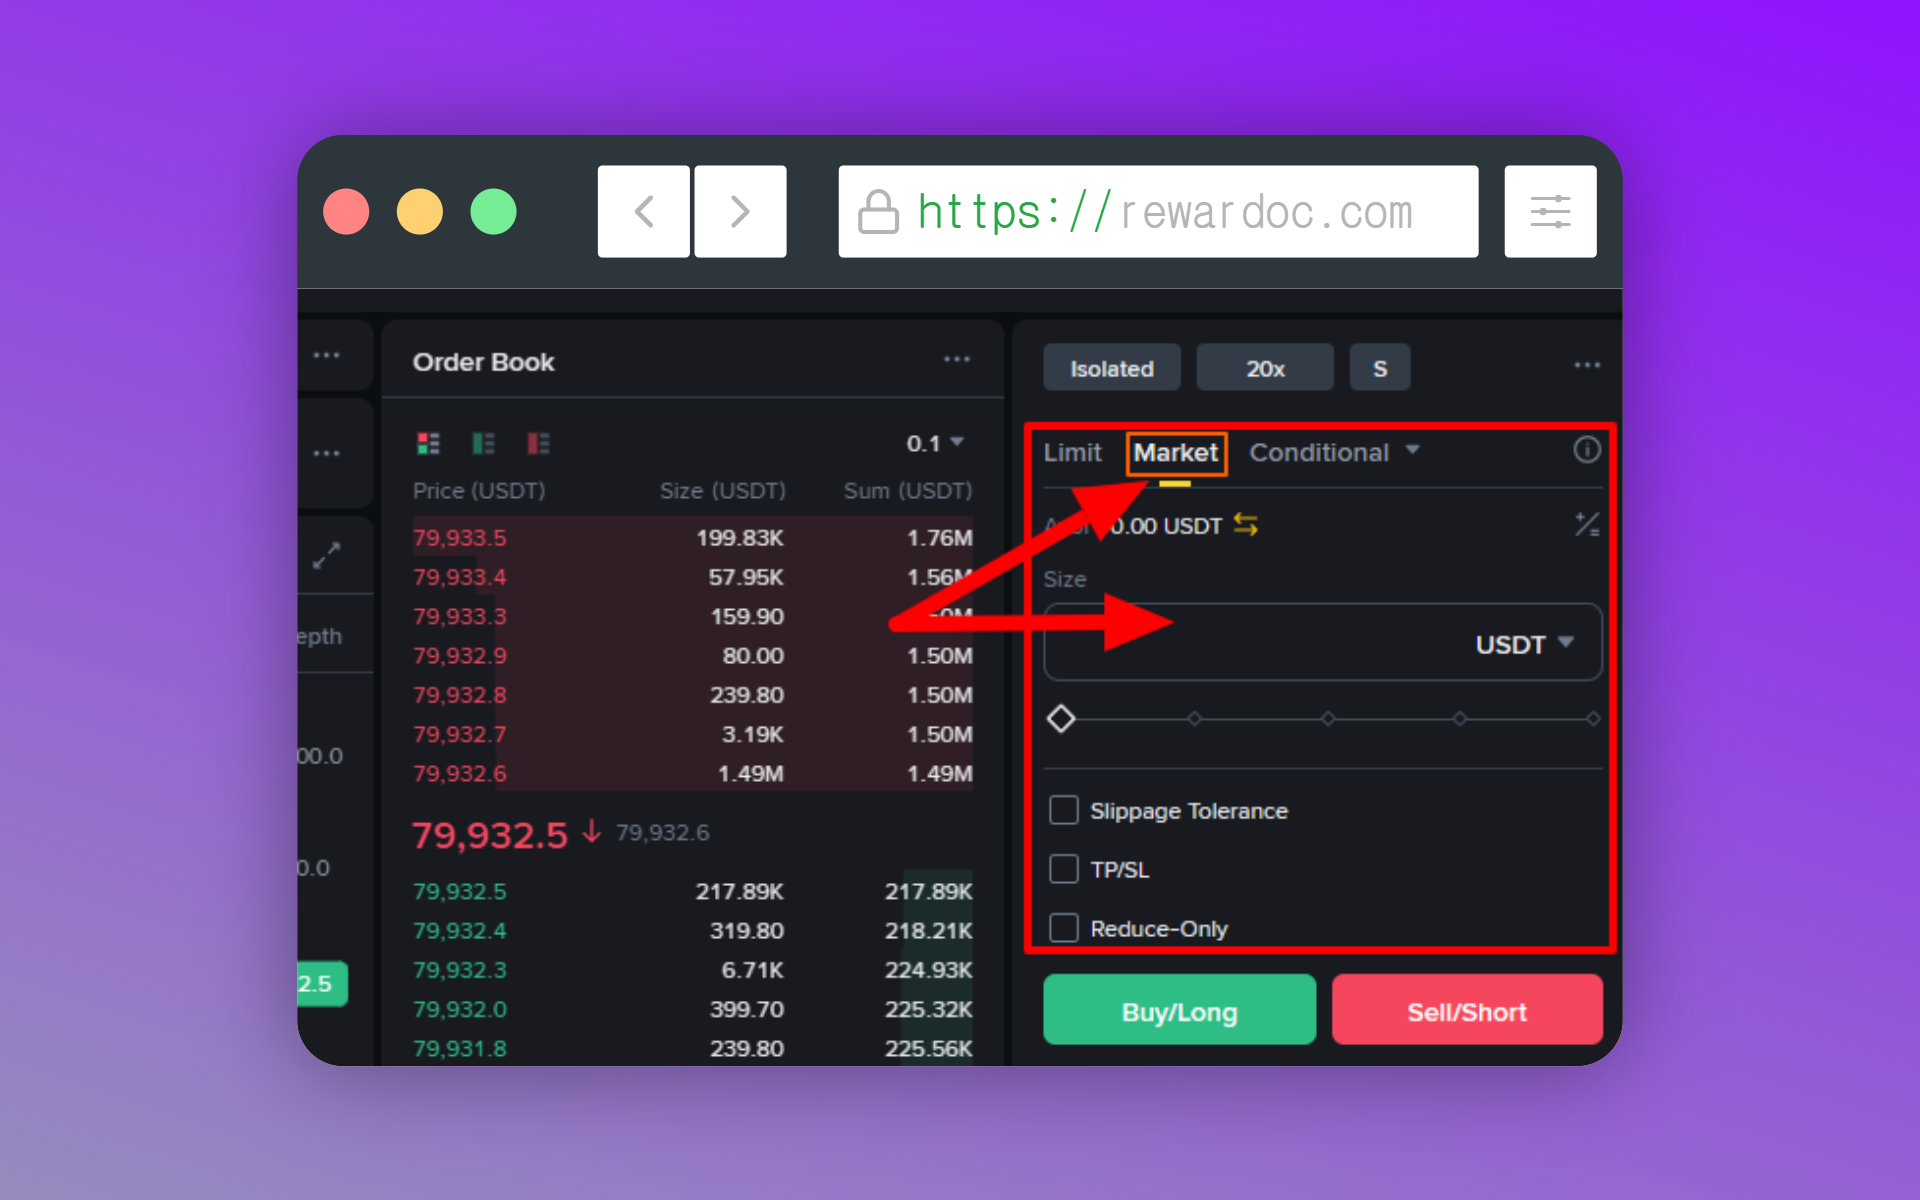
If you picked Market, the price field disappears. The order fills at the current market price immediately, so all you enter is the size.
3. Checking the liquidation price
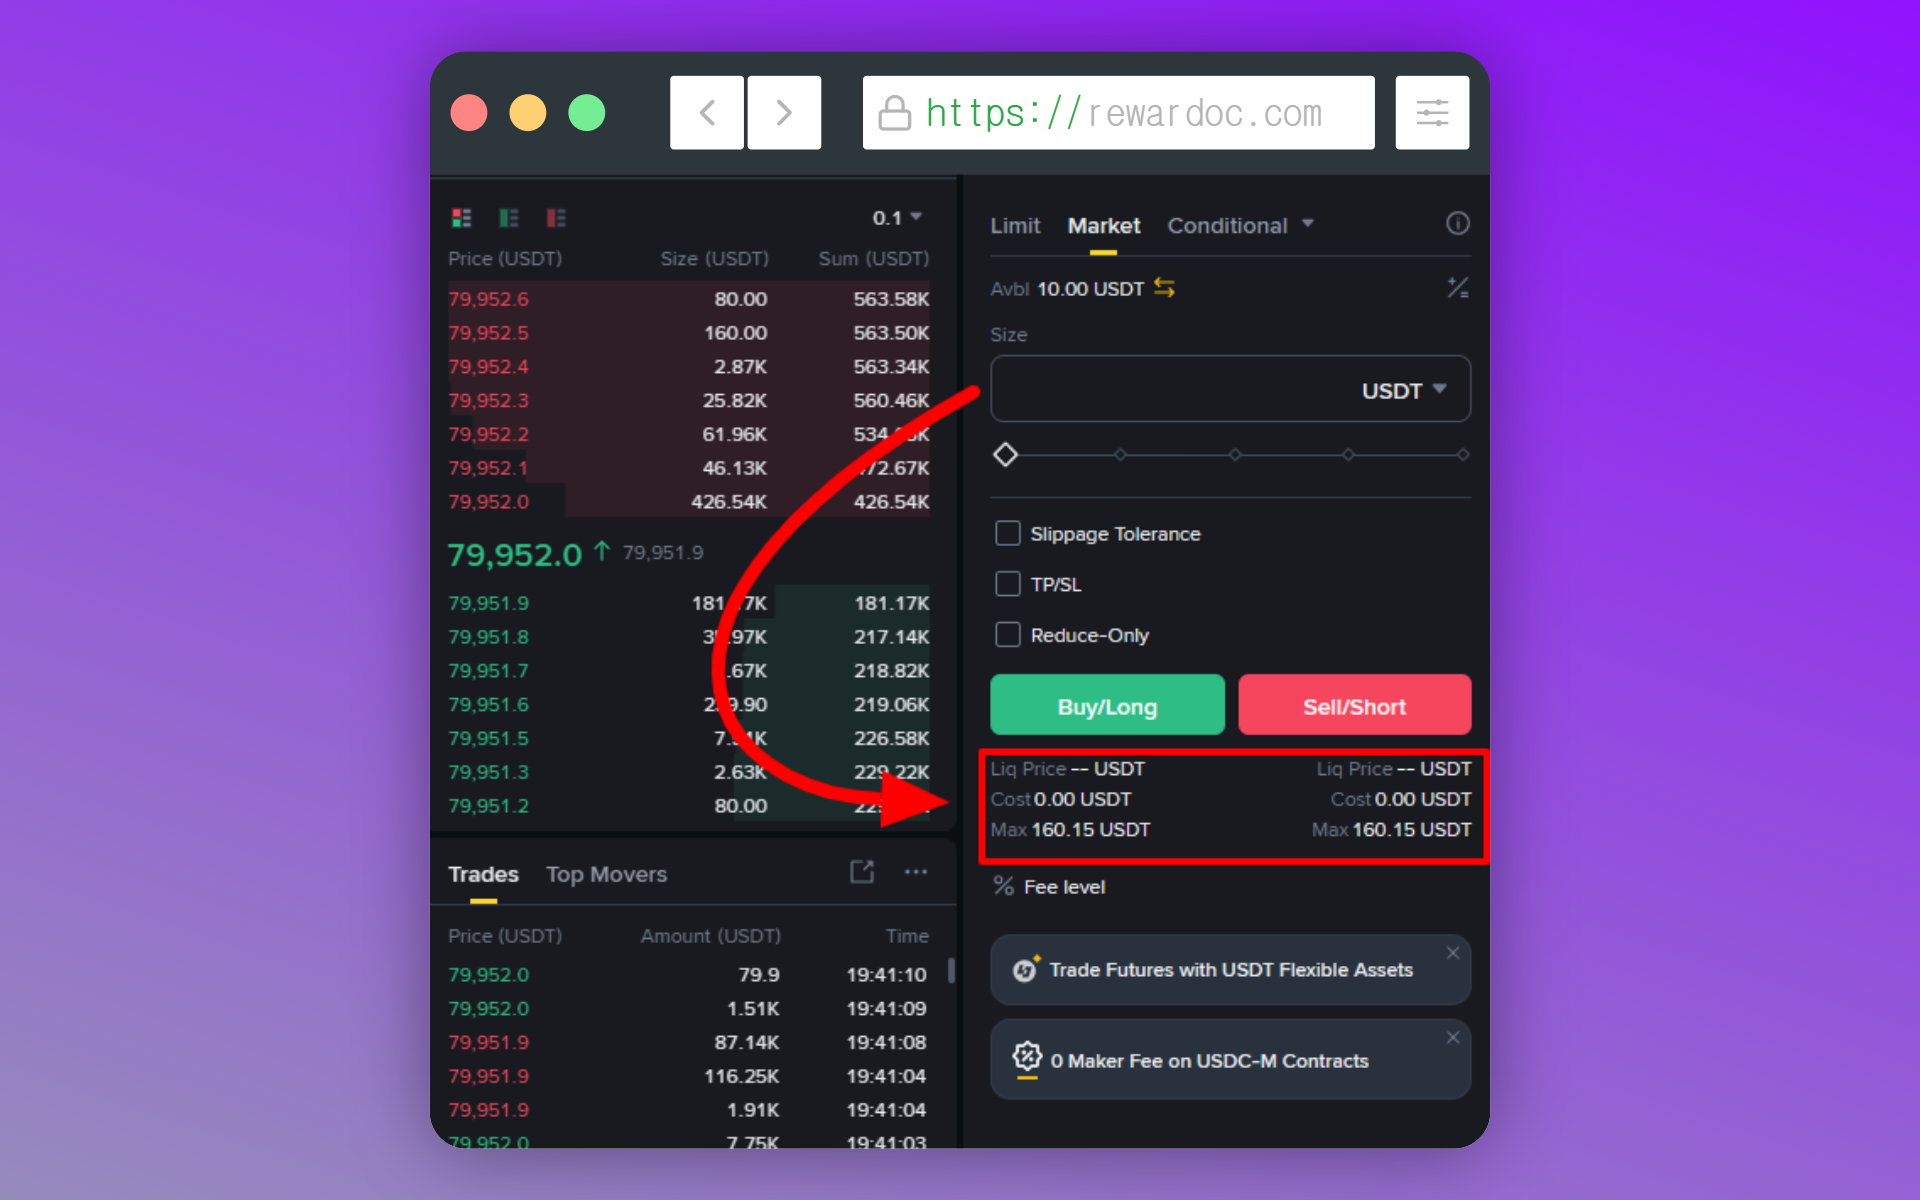
Look at the estimated liquidation price (Liq. Price) shown in the order info area before you go any further. Touch that price and the position gets force-closed. If the liquidation price sits too close for comfort, drop your leverage or cut your size.
4. Clicking long or short (placing the order)
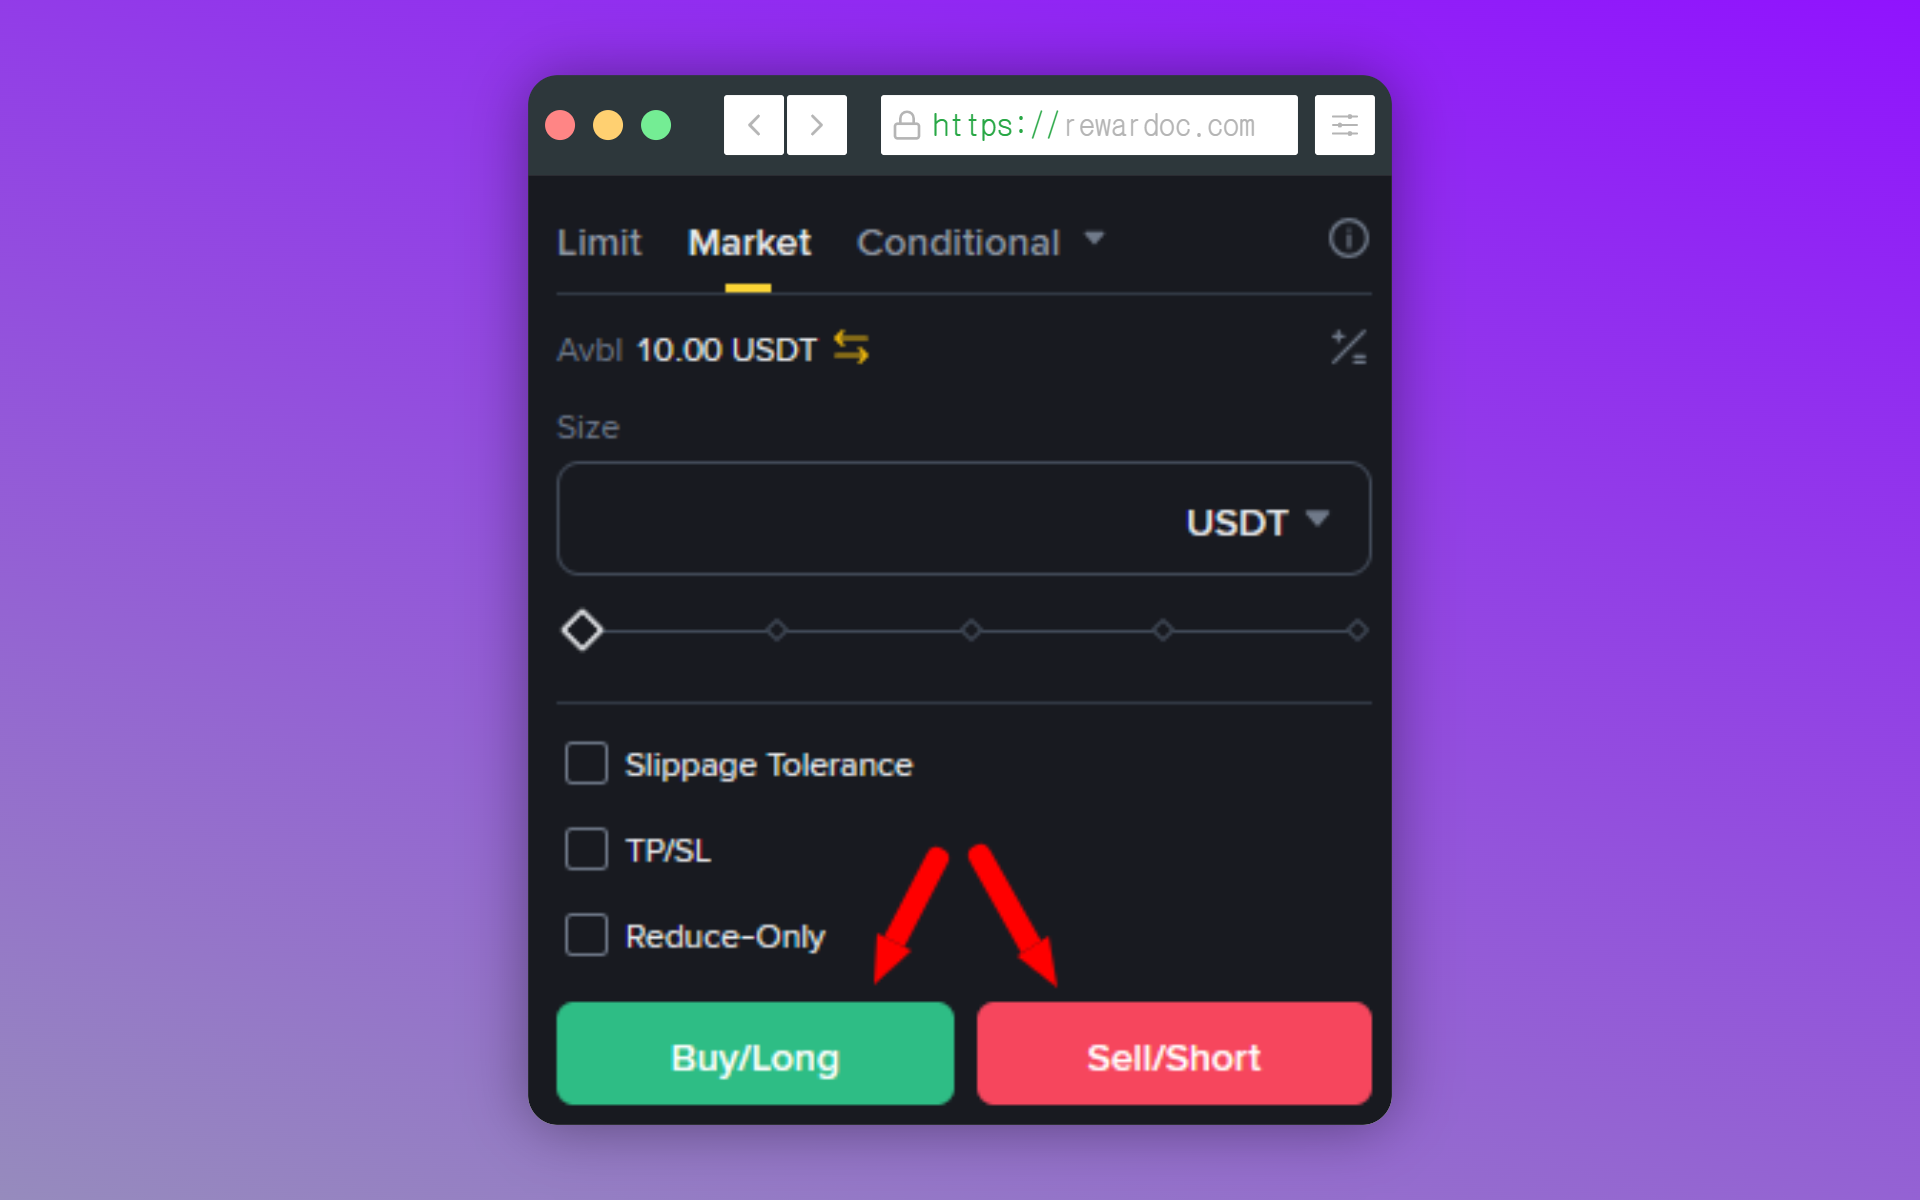
Think it's going up, click the green [Buy/Long]. Think it's going down, the red [Sell/Short]. With a limit price it sits as an open order; with market it fills at the current price instantly.
5. Checking your position
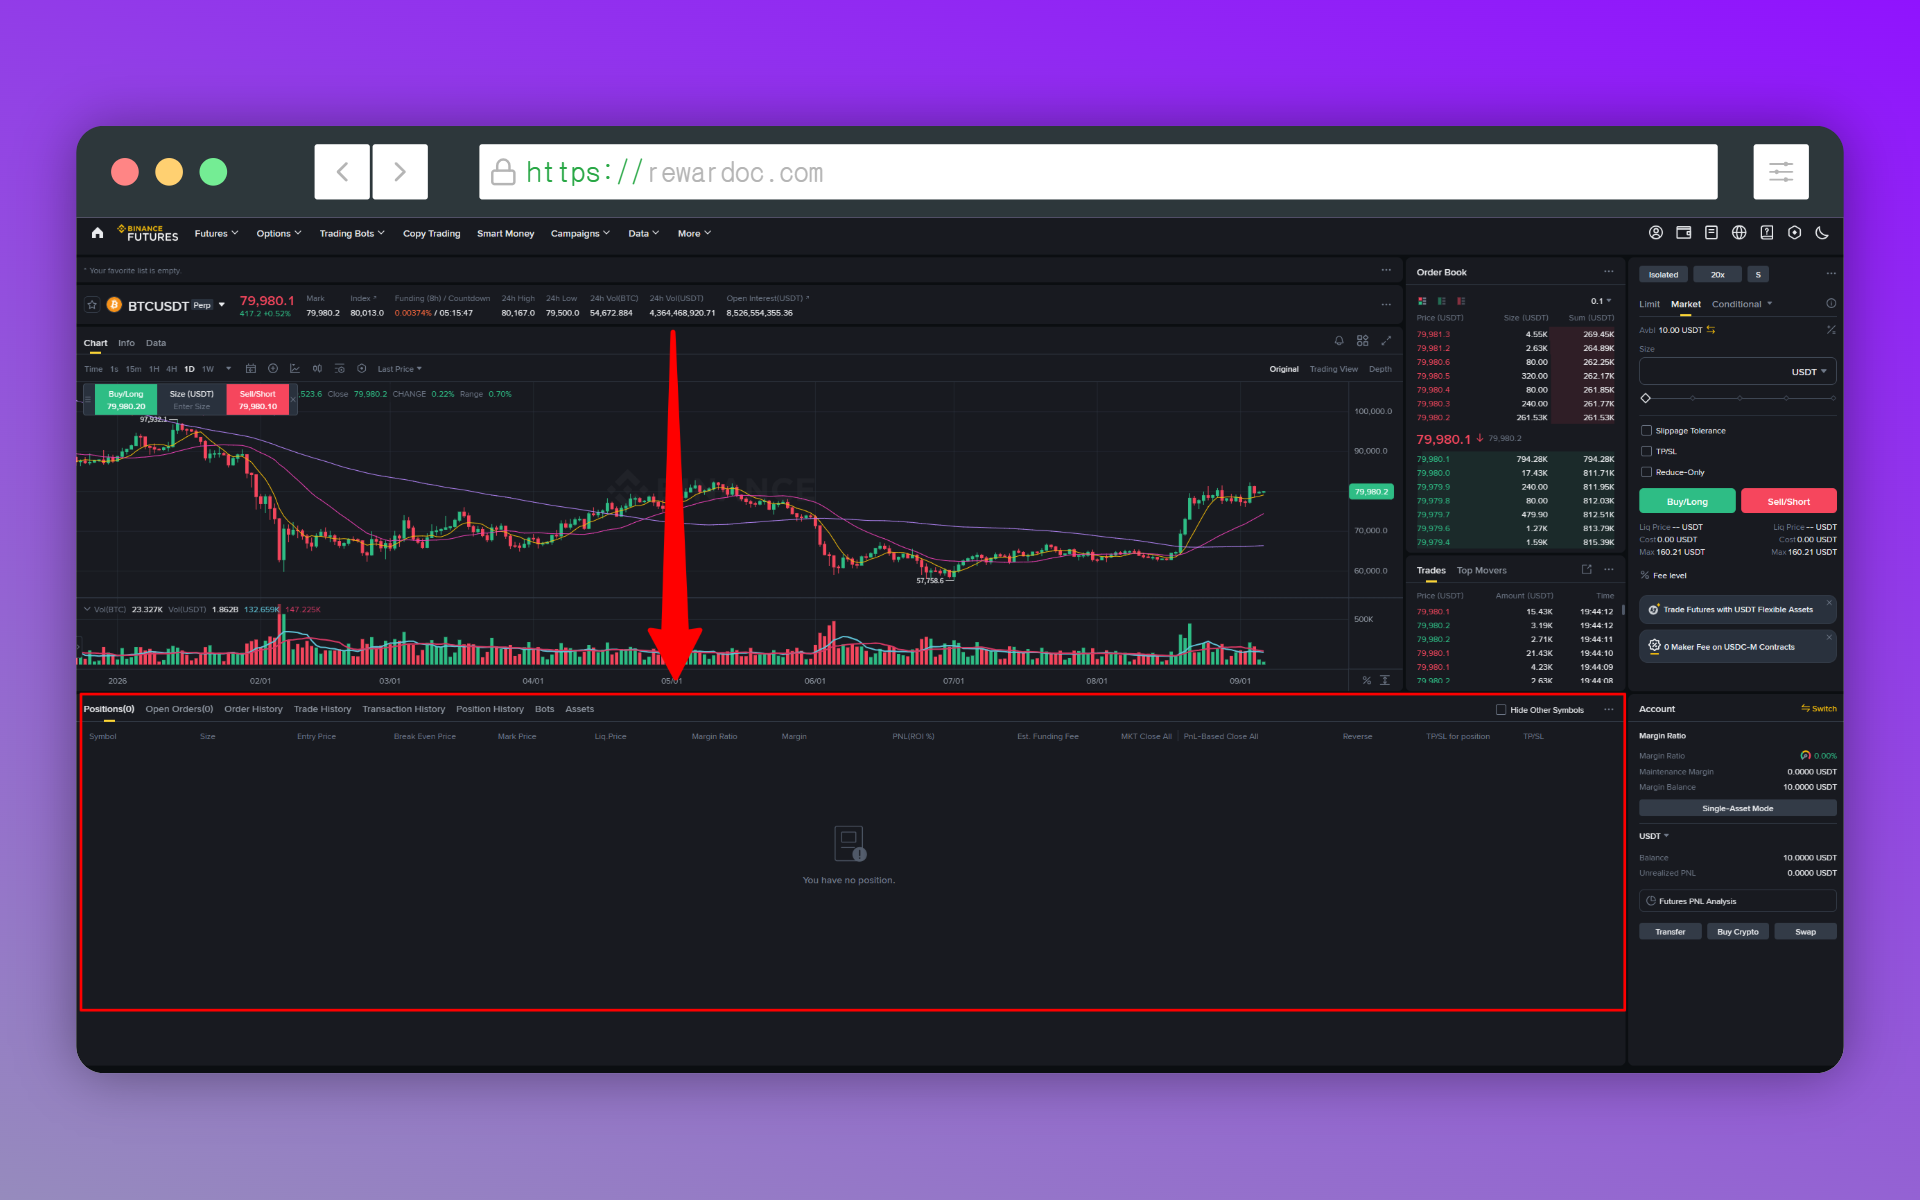
The [Positions] tab at the bottom of the screen shows whatever you currently have open. Entry price, size, unrealized PNL, and liquidation price are all there.
Setting take profit and stop loss (TP/SL)
Setting TP/SL is not mandatory. Leave the fields blank, hit [Confirm], and the position just runs with no take profit or stop loss attached. This is where you set your target and your exit ahead of time, for when you can't sit watching the chart and react on the spot.
1. Opening TP/SL
In the [Positions] tab, click the [TP/SL] entry on that position.
2. Entering your target and stop
Put your target in Take Profit and your cut-off in Stop Loss.
3. Confirming
Click [Confirm]. If the TP/SL prices now show on the position row, it's set. You can walk away and your loss stops at the line you drew, and profits get taken at the price you picked.
Closing out (clearing the position)
1. Closing manually
If you want out of the market immediately before your target hits, click [Close] or [Market] in the [Positions] tab. An opposing order fires instantly and the position clears. To exit at a set price, choose [Limit] and type in the price you want.
2. Checking your P&L
![Reviewing closed positions via the [Order History] or [Trade History] tabs at the bottom of the screen](/uploads/blog/how-to-trade-binance-futures/image-mtpotjj20.png)
Closed positions show up as realized P&L in the [Order History] or [Trade History] tabs. What you see there is your result after trading fees and funding fees have been deducted. Hold a position for a while and funding accrues every 8 hours, so dragging a trade out over days eats into your profit even when the direction was right.
What is funding?
It's a price-balancing fee that keeps the futures price from drifting too far from the actual spot price. When too many people pile onto one side (say, long), that crowded side pays the other side (short) a set percentage every 8 hours. If you're standing with the majority, that money keeps draining out just from holding — which is why it can quietly bleed a long-term position.
3. Getting your funds back (sending them to spot)
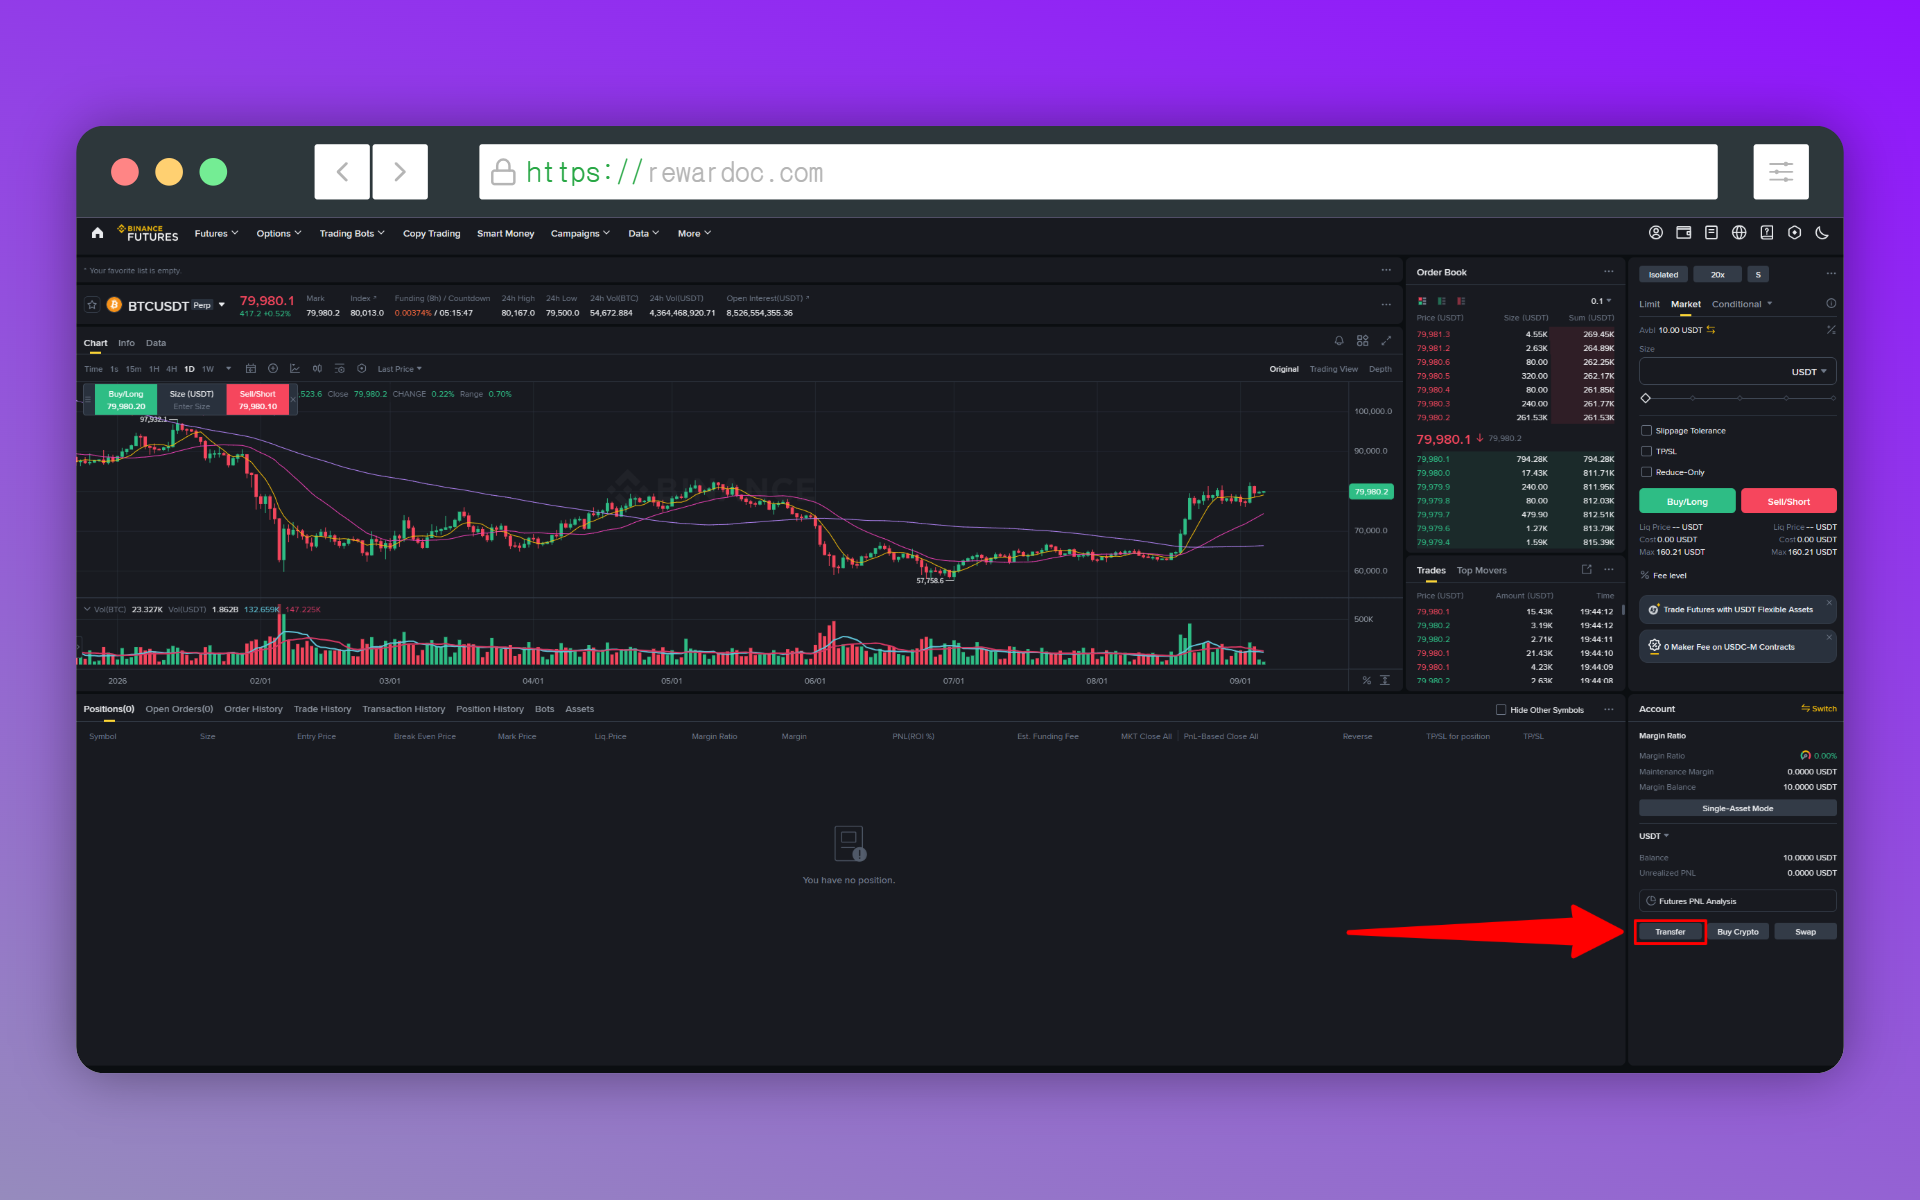
Done trading and want the money back in your spot account? Hit [Transfer] again, but this time set From to [USD-M Futures] and To to [Spot].
Wrapping up
This ran a bit long. Laying out every function in order makes it look far more complicated than it is. If you've traded spot before, this won't be much of a step up. Learning to ride a bike from a written guide sounds complicated too — get on the pedals and it's easy. Above all, don't forget that with leverage in play, risk management matters more than anything else in futures.